Smart Pro H Key Bladed All Keys Lost
When all keys are lost on applicable Toyota "H" key systems the special ADC2016 harness can be used to connect to a few fuse positions and the key warning switch in the vehicle. This allows the Smart Pro to perform a special procedure to extract the immobiliser memory via diagnostics and create an existing temporary key onto the ADC2015 Texas Emulator. This can then be used as the working master to to perform a normal add key procedure.
Required Parts:
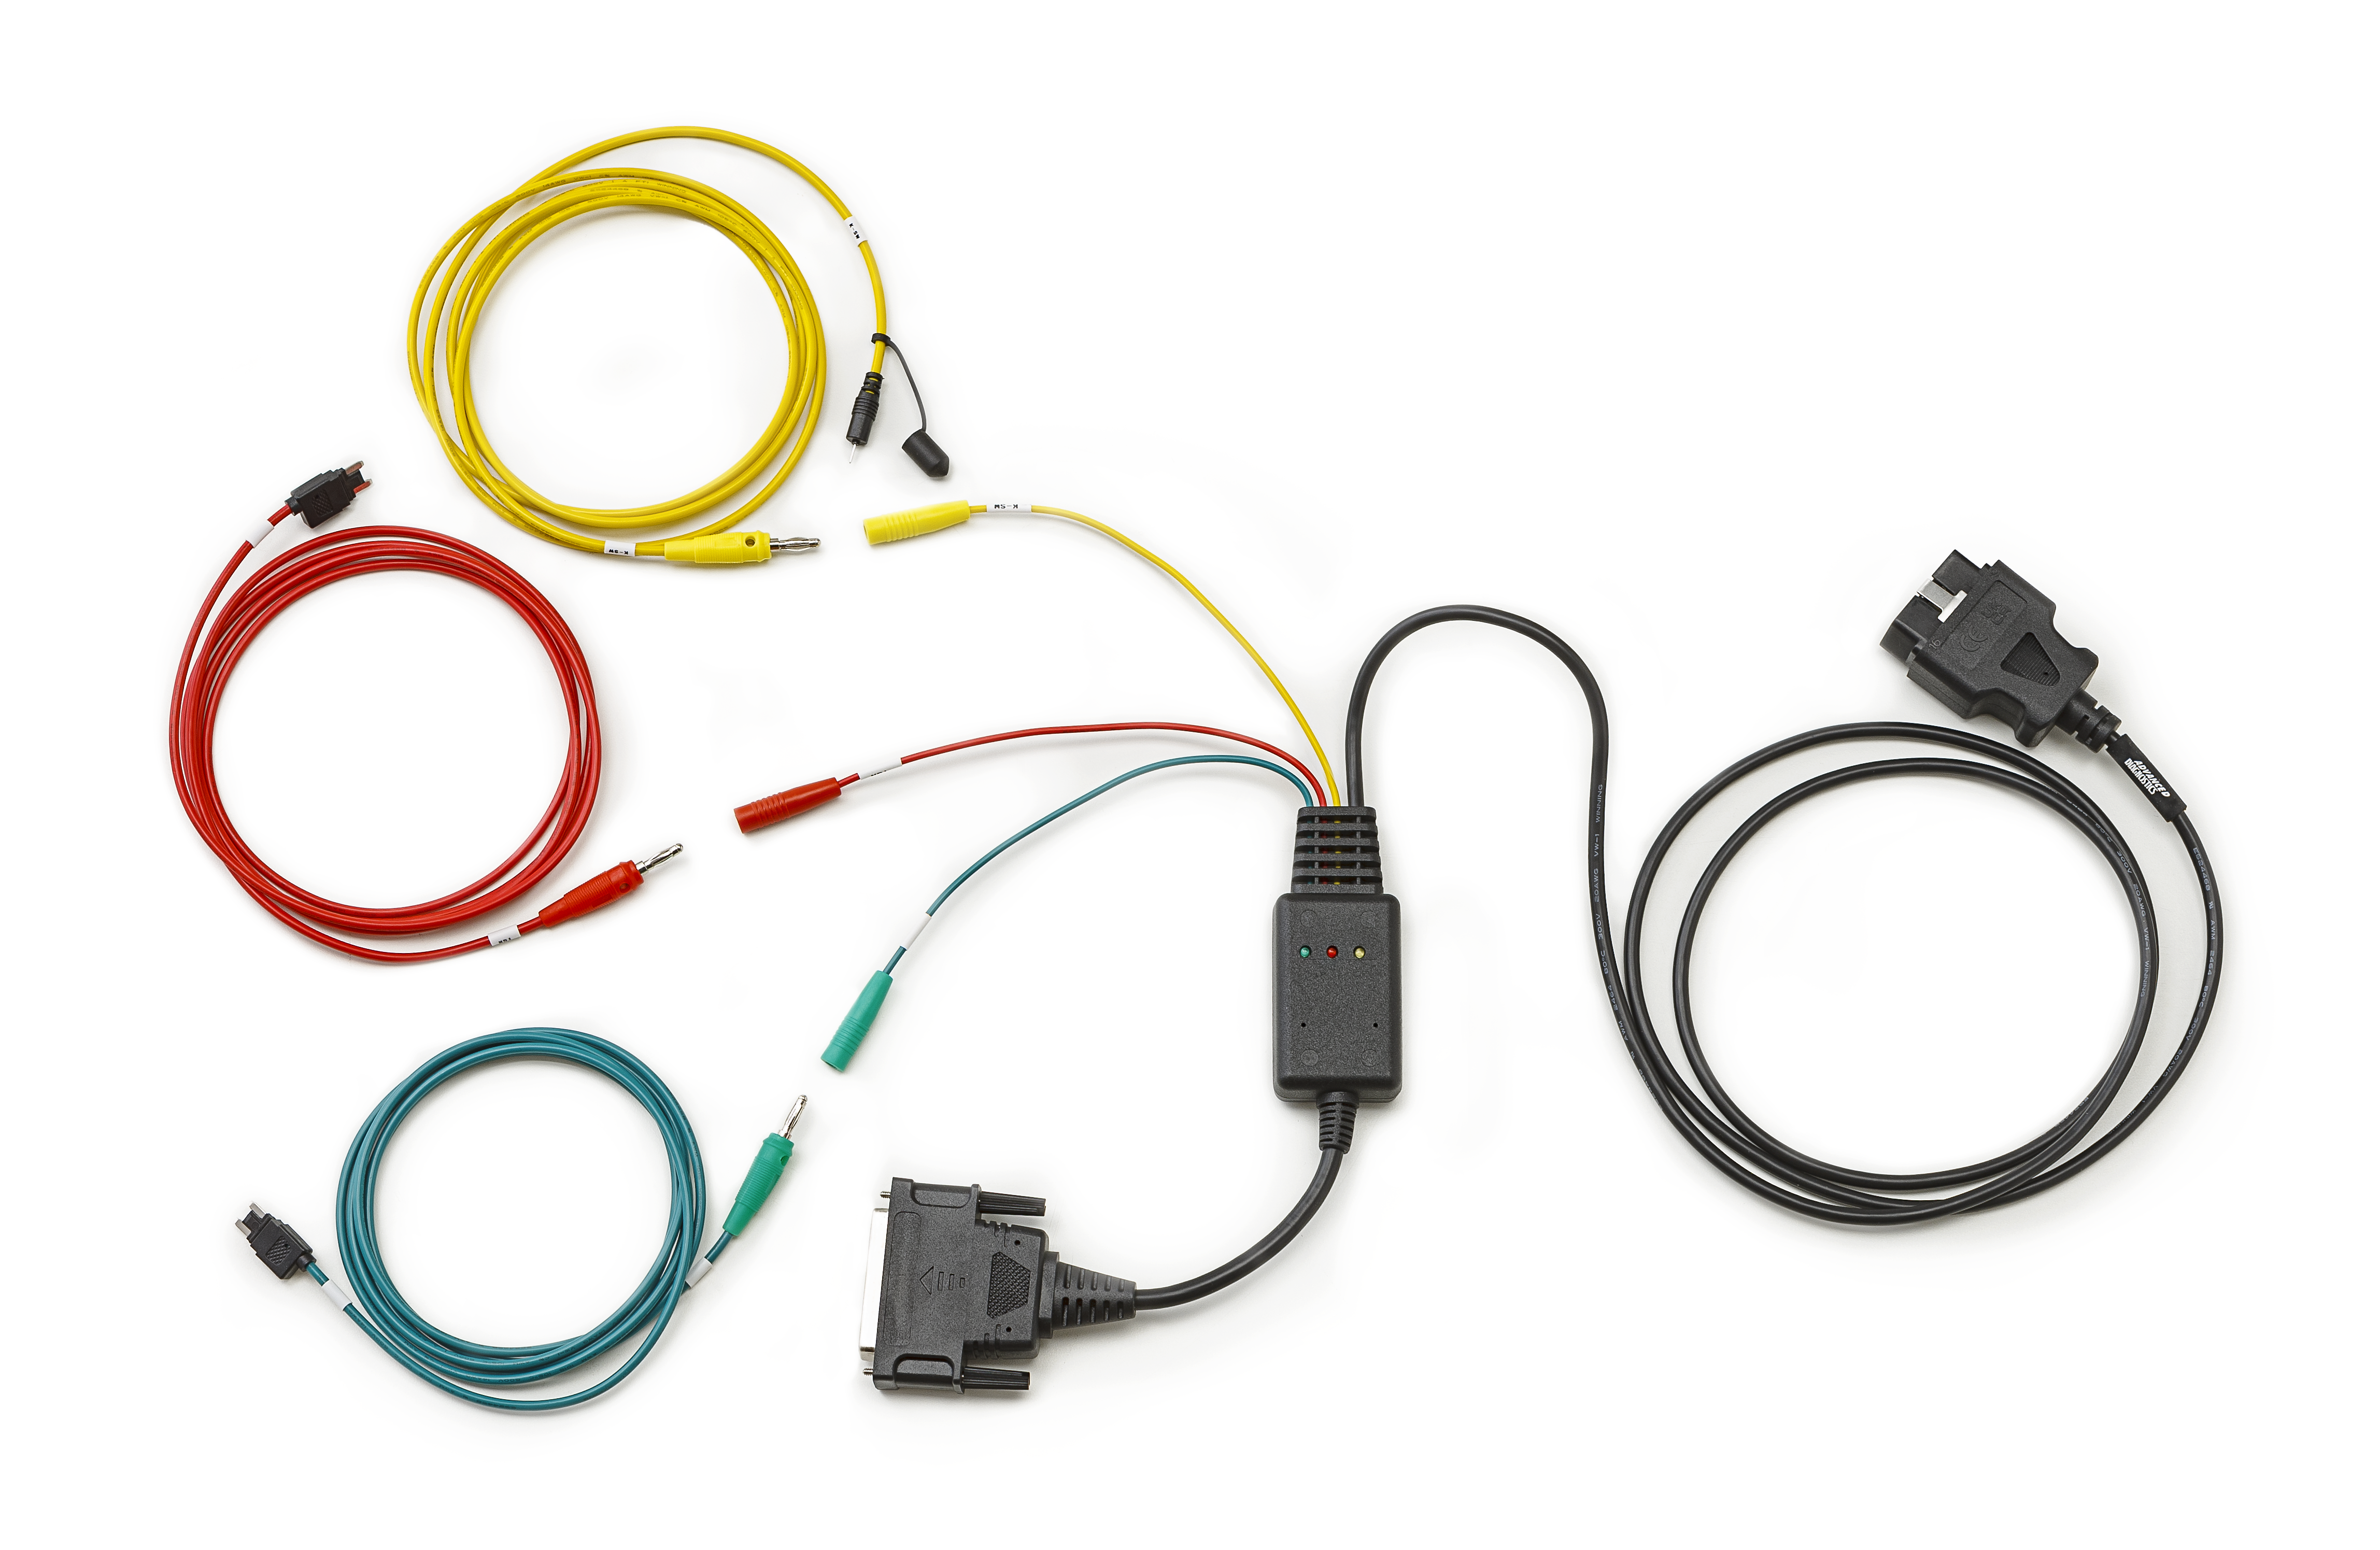
ADC2016 H KEY ALL KEYS LOST HARNESS
The ADC2016 harness has three coloured cables:
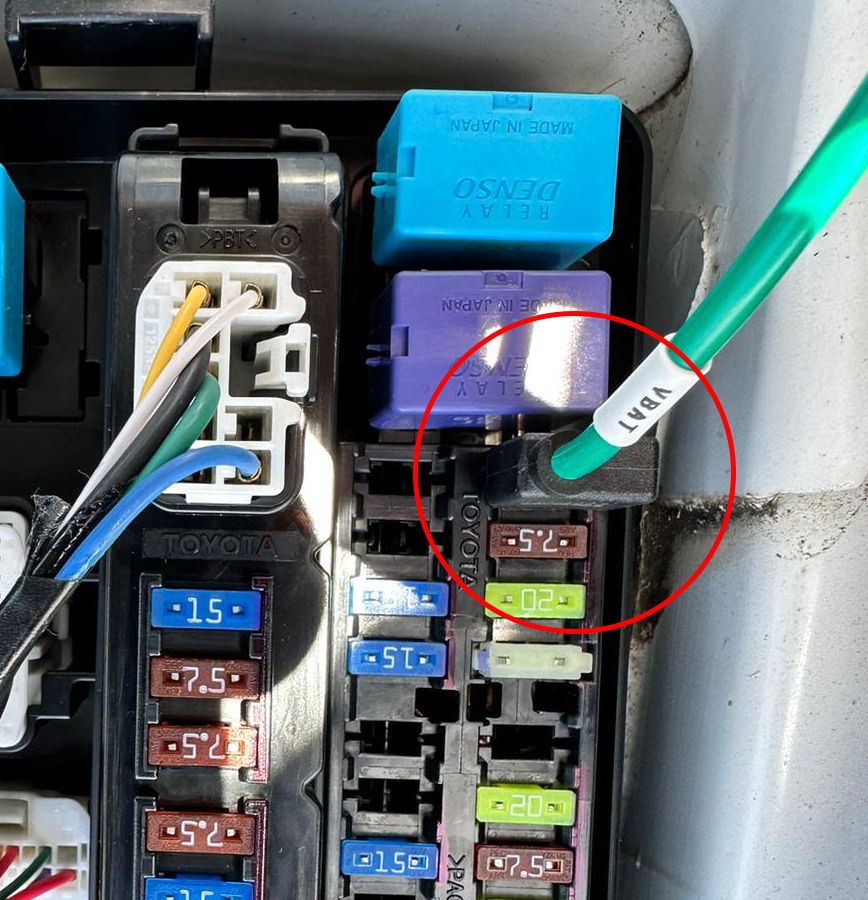
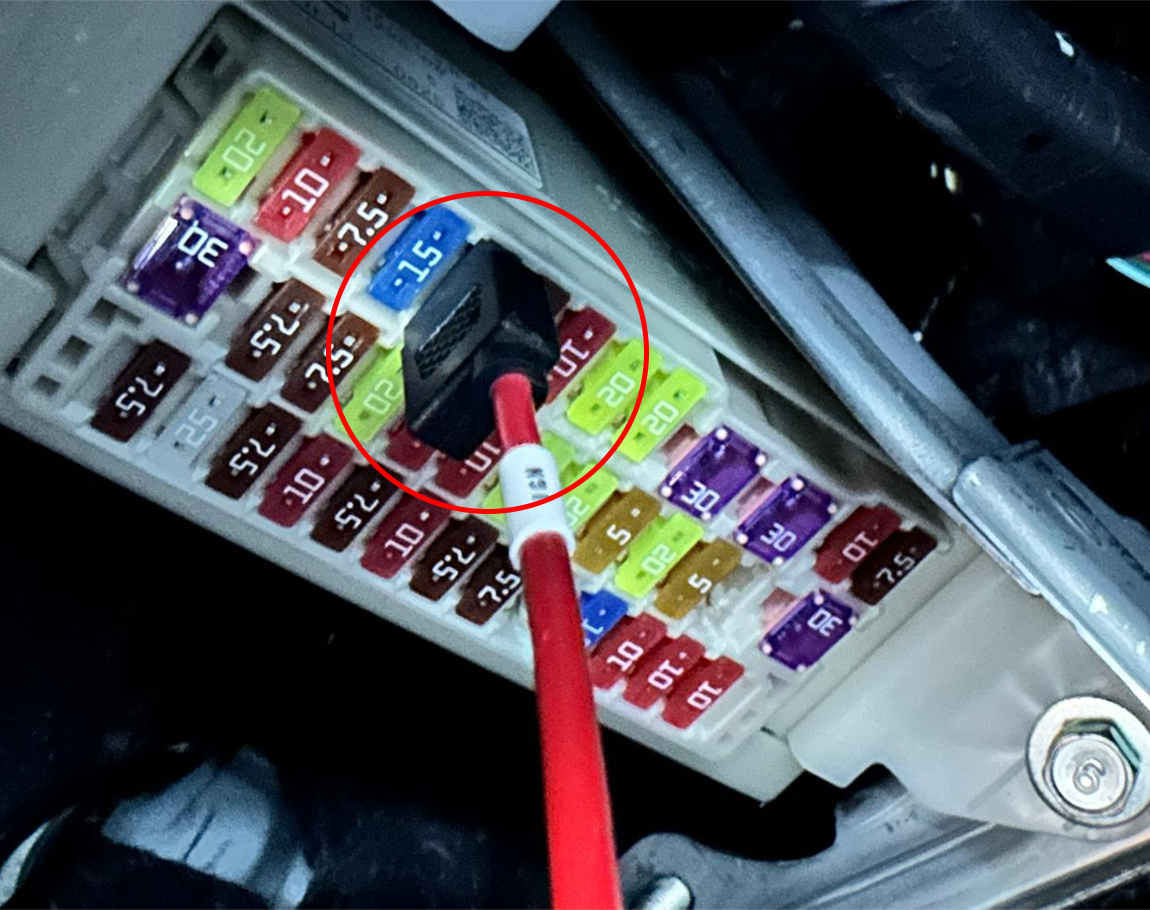
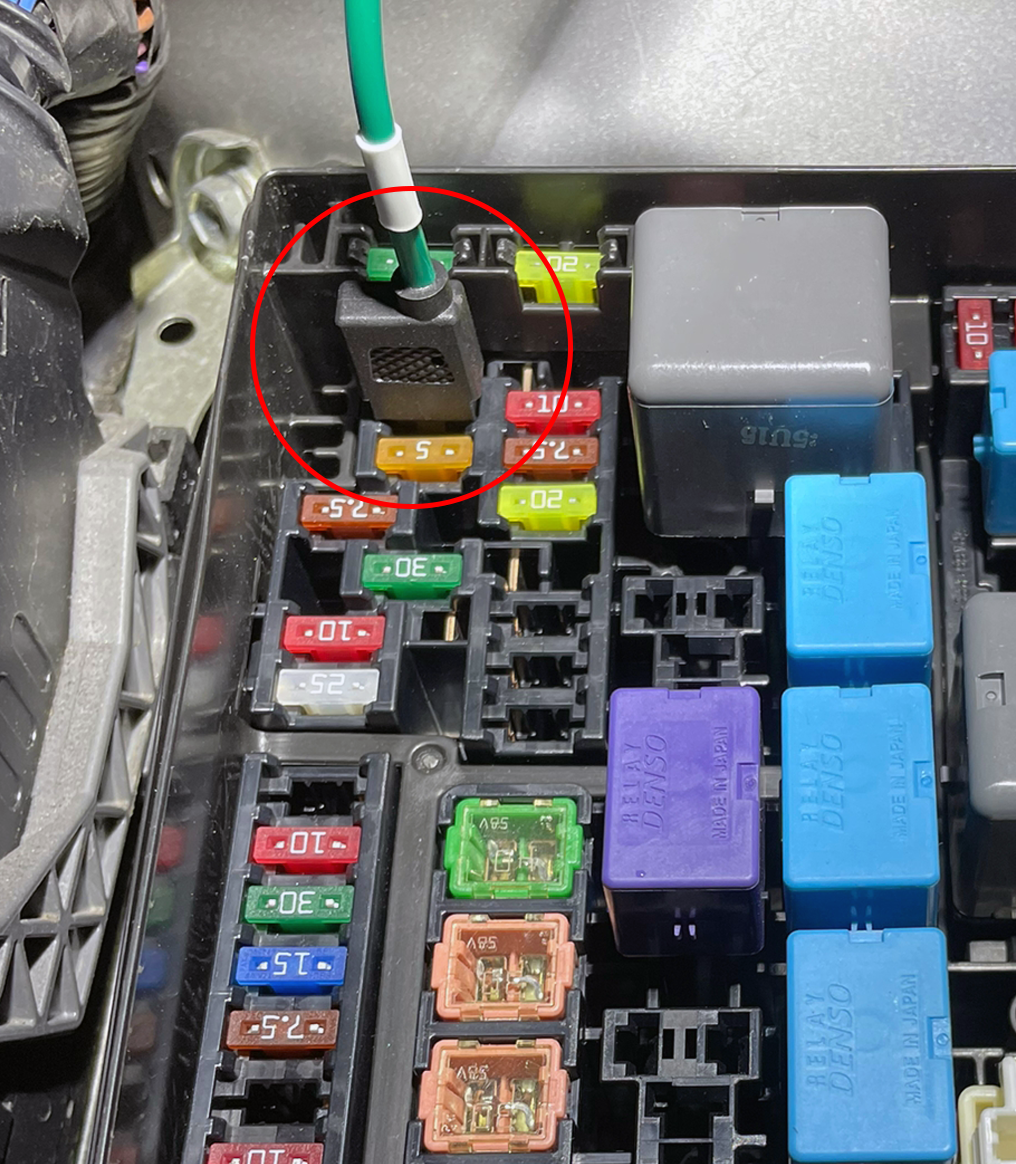
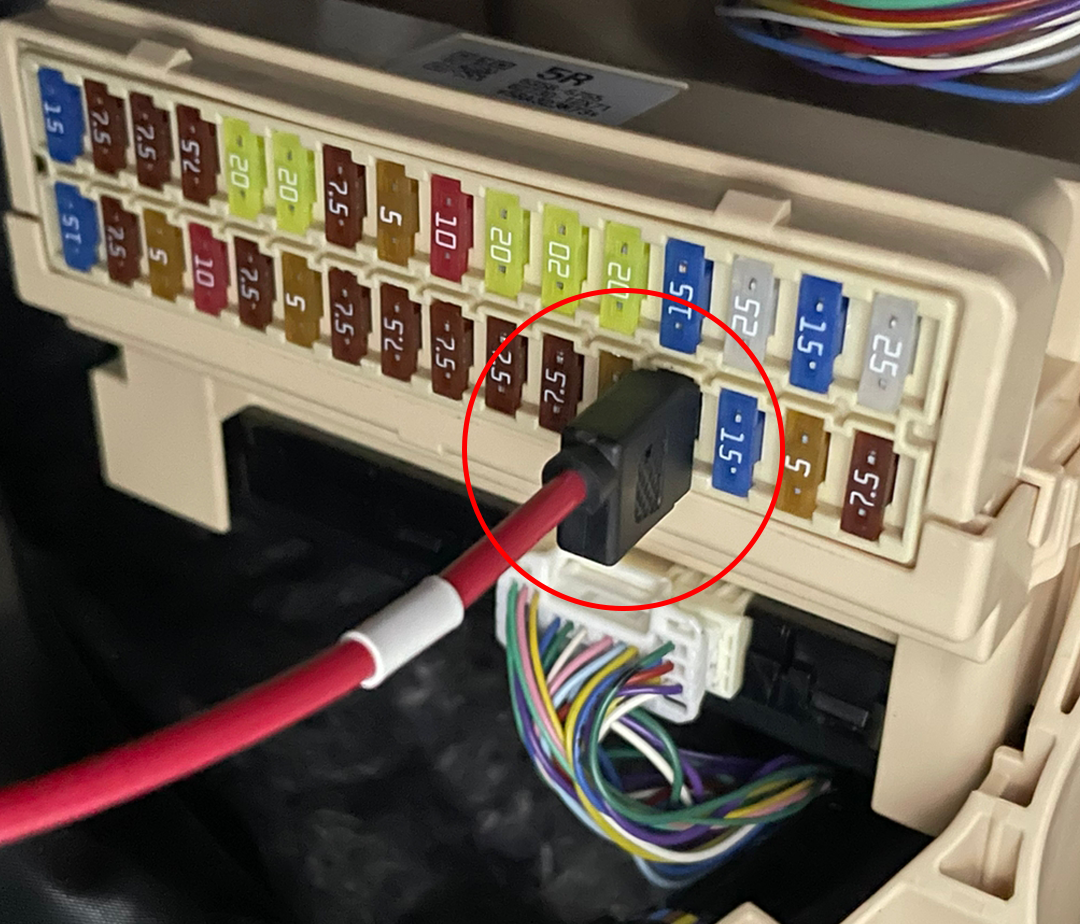
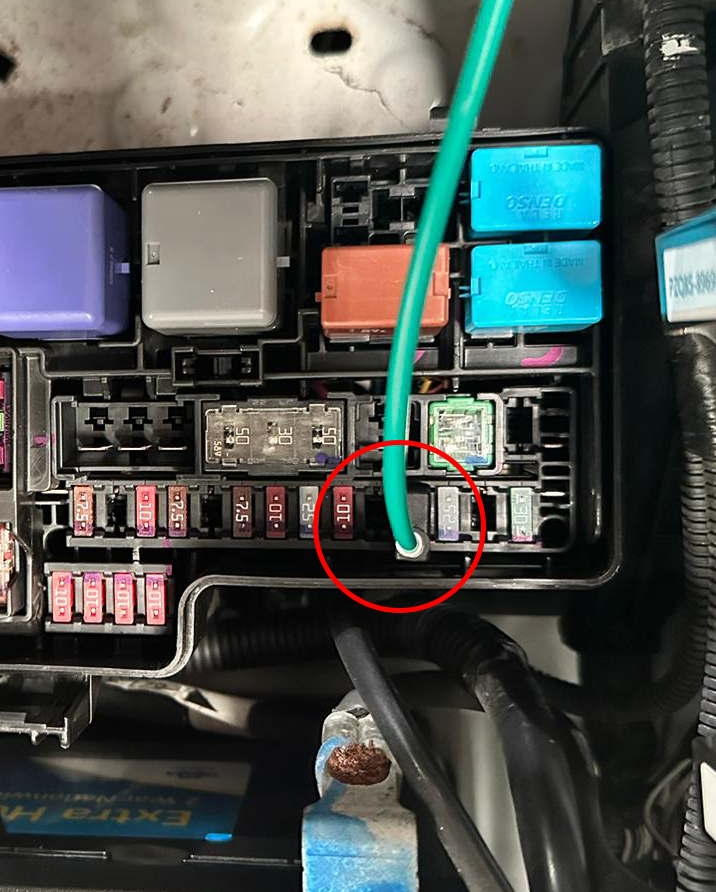
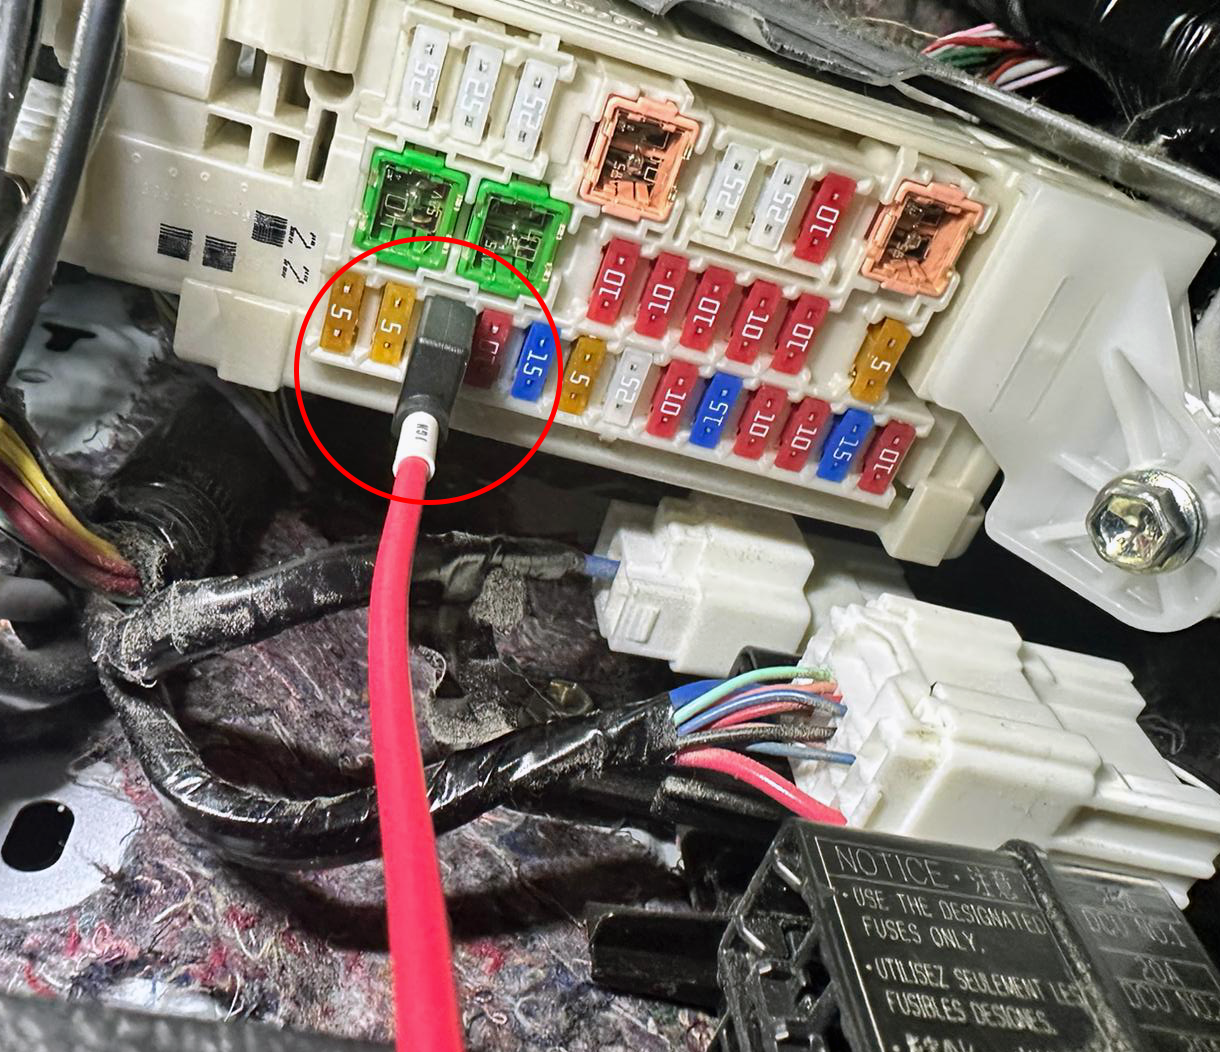
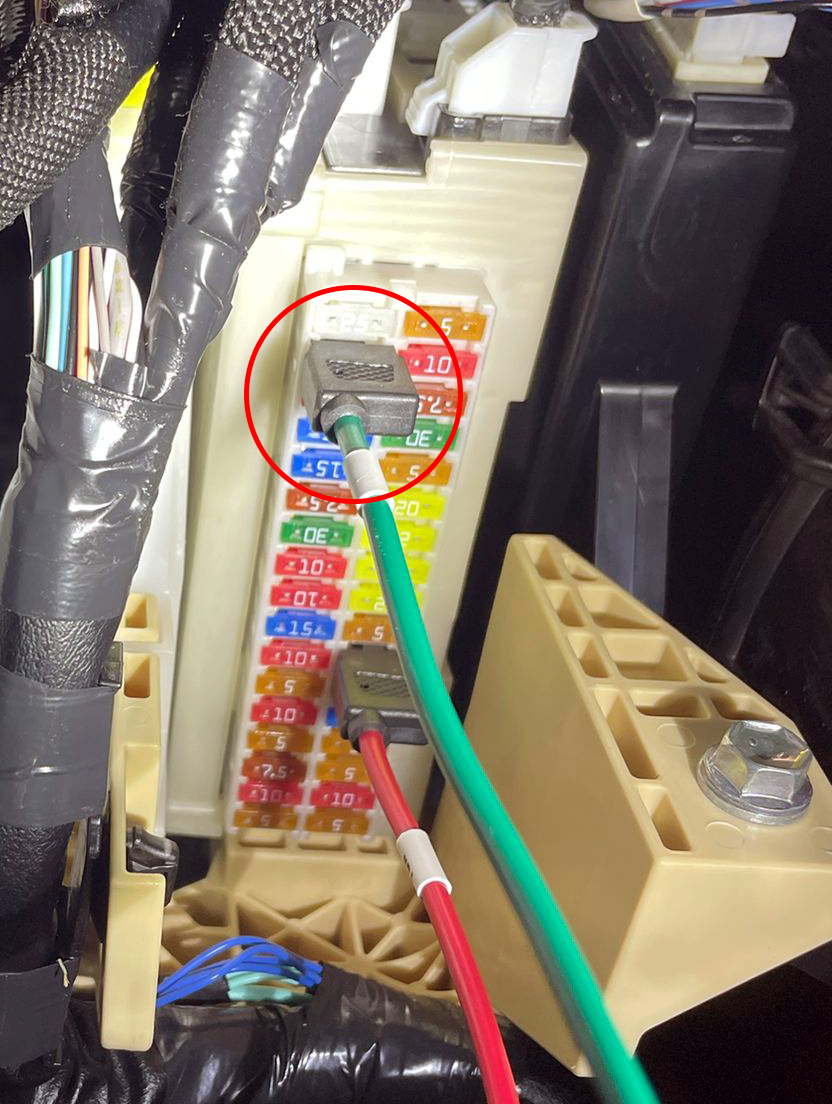
GREEN & RED CABLES
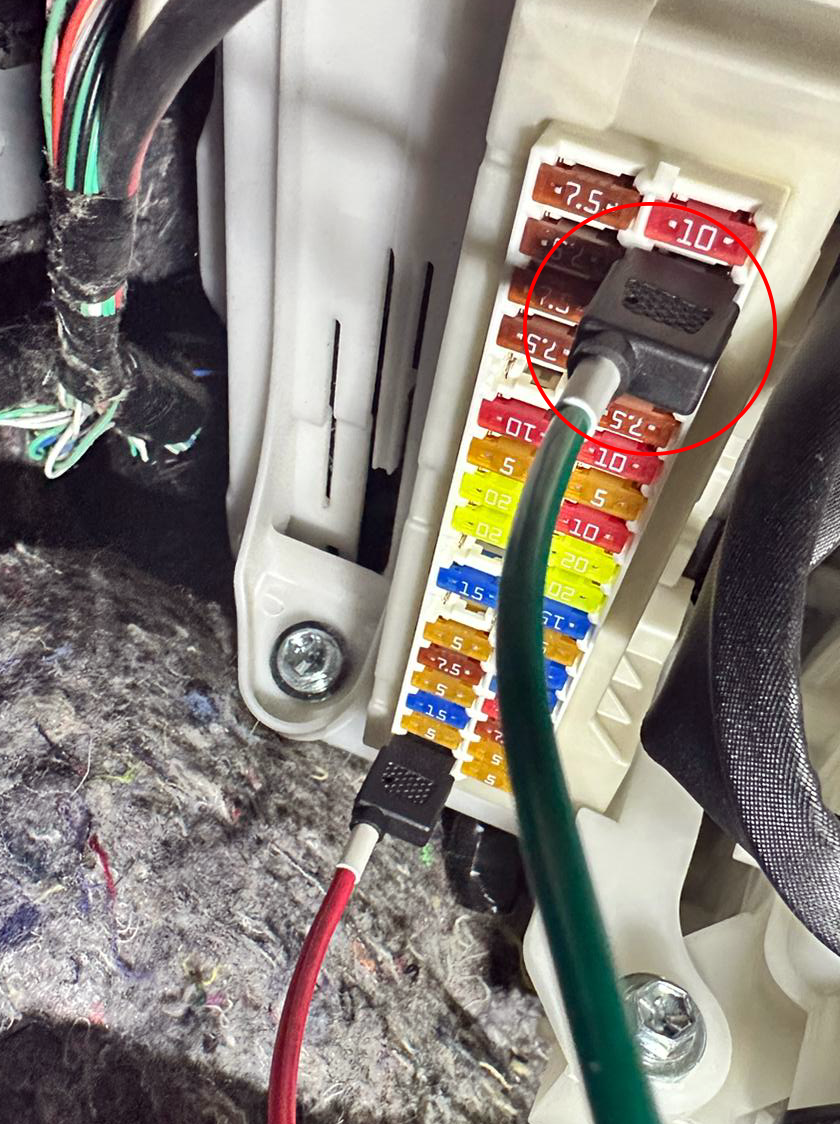
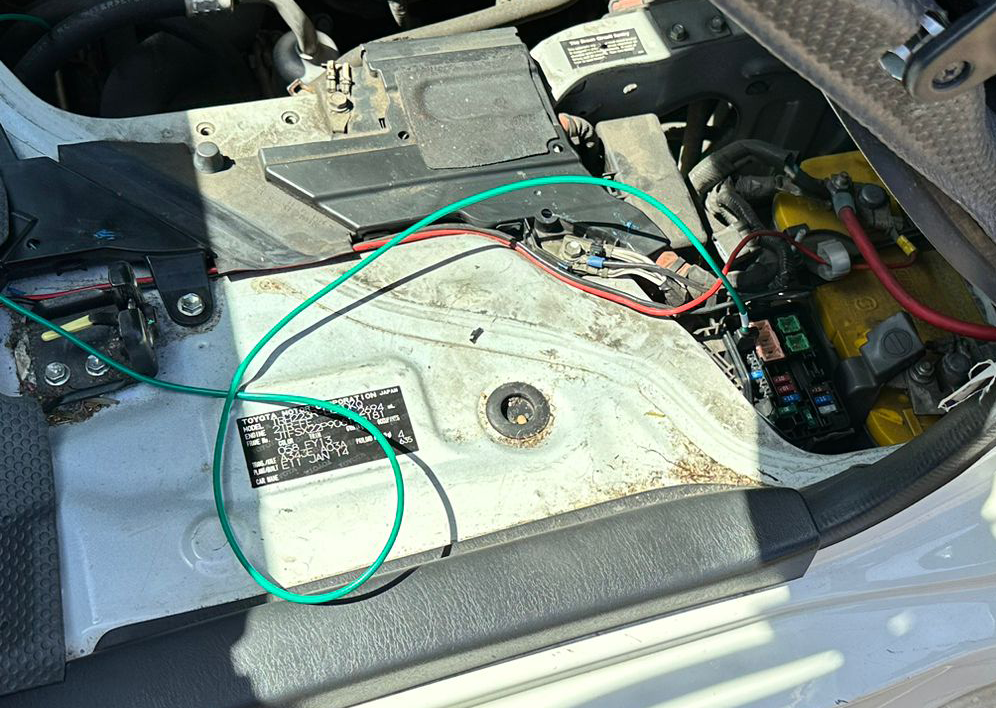
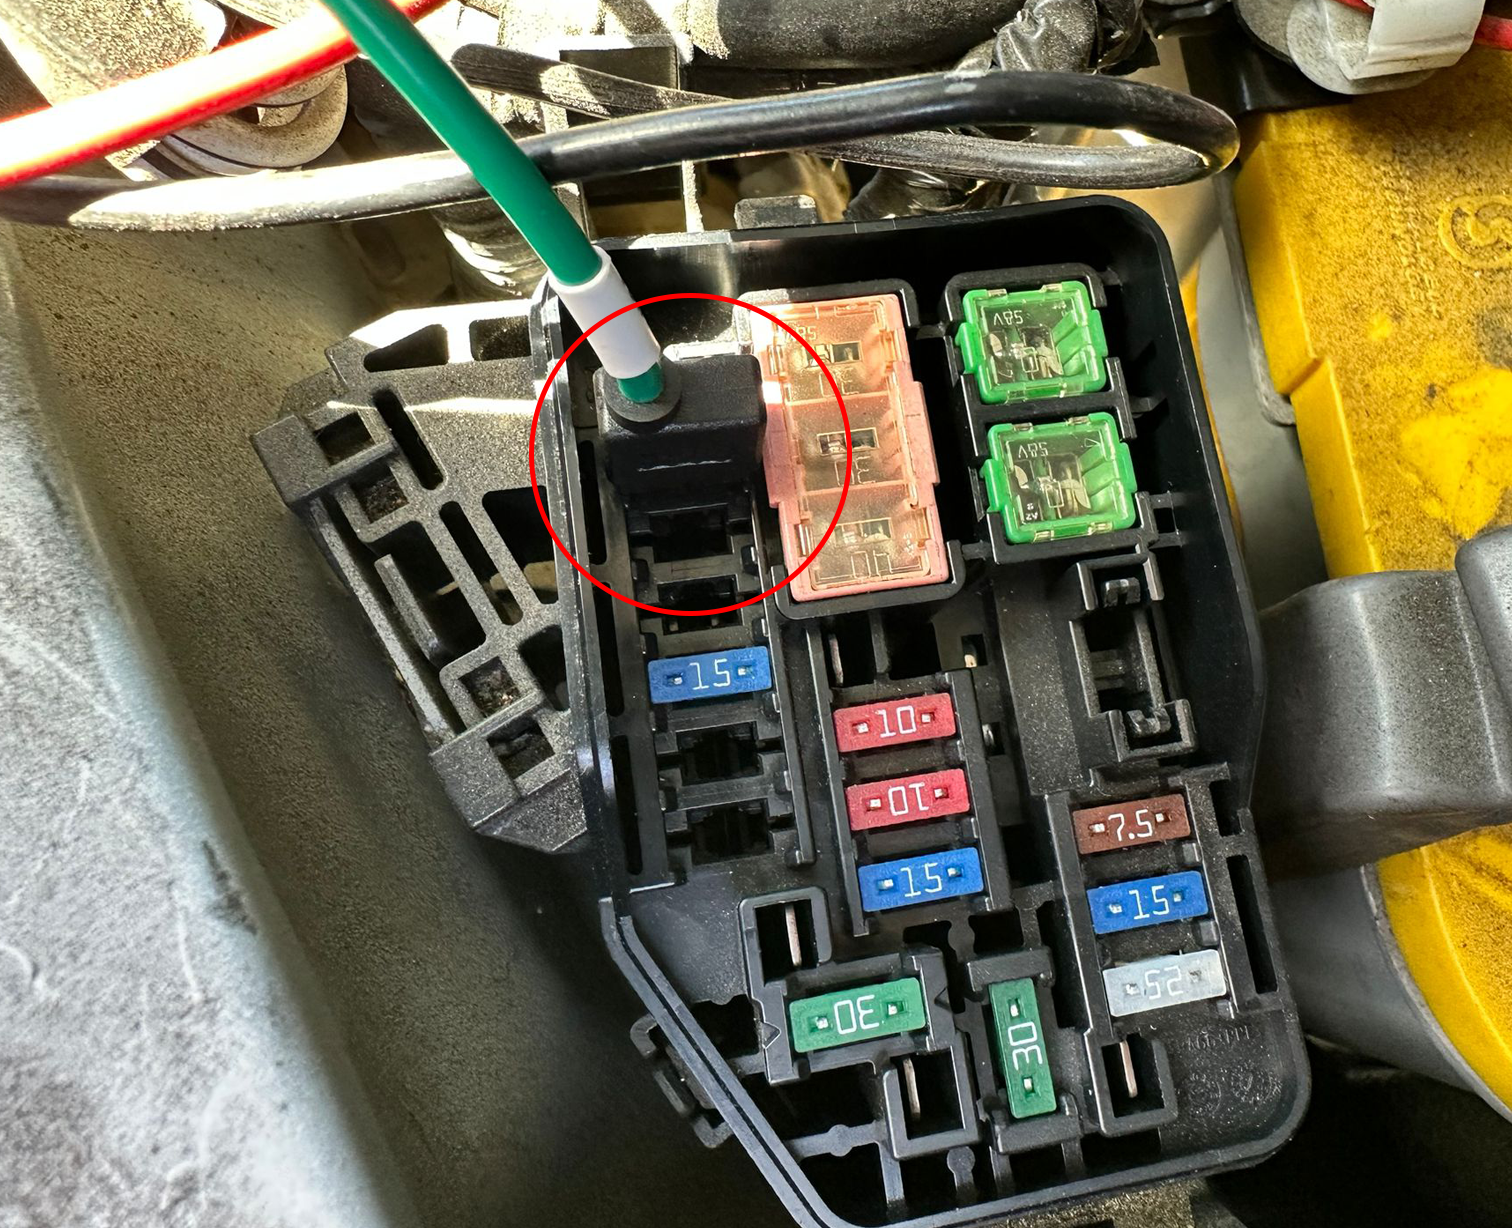
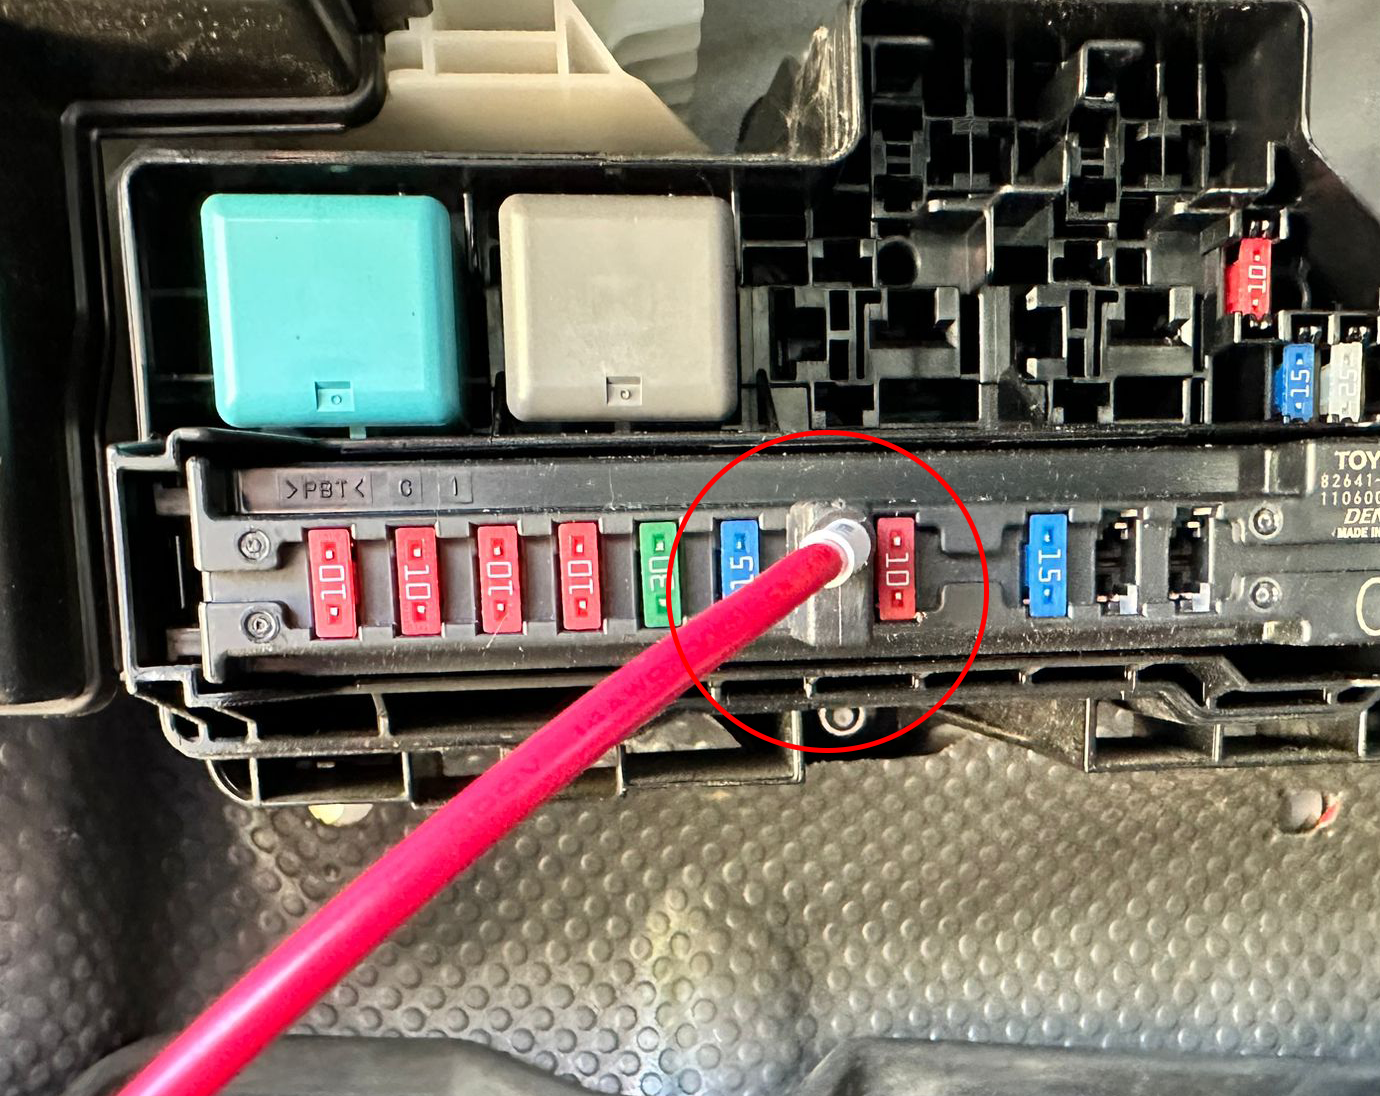
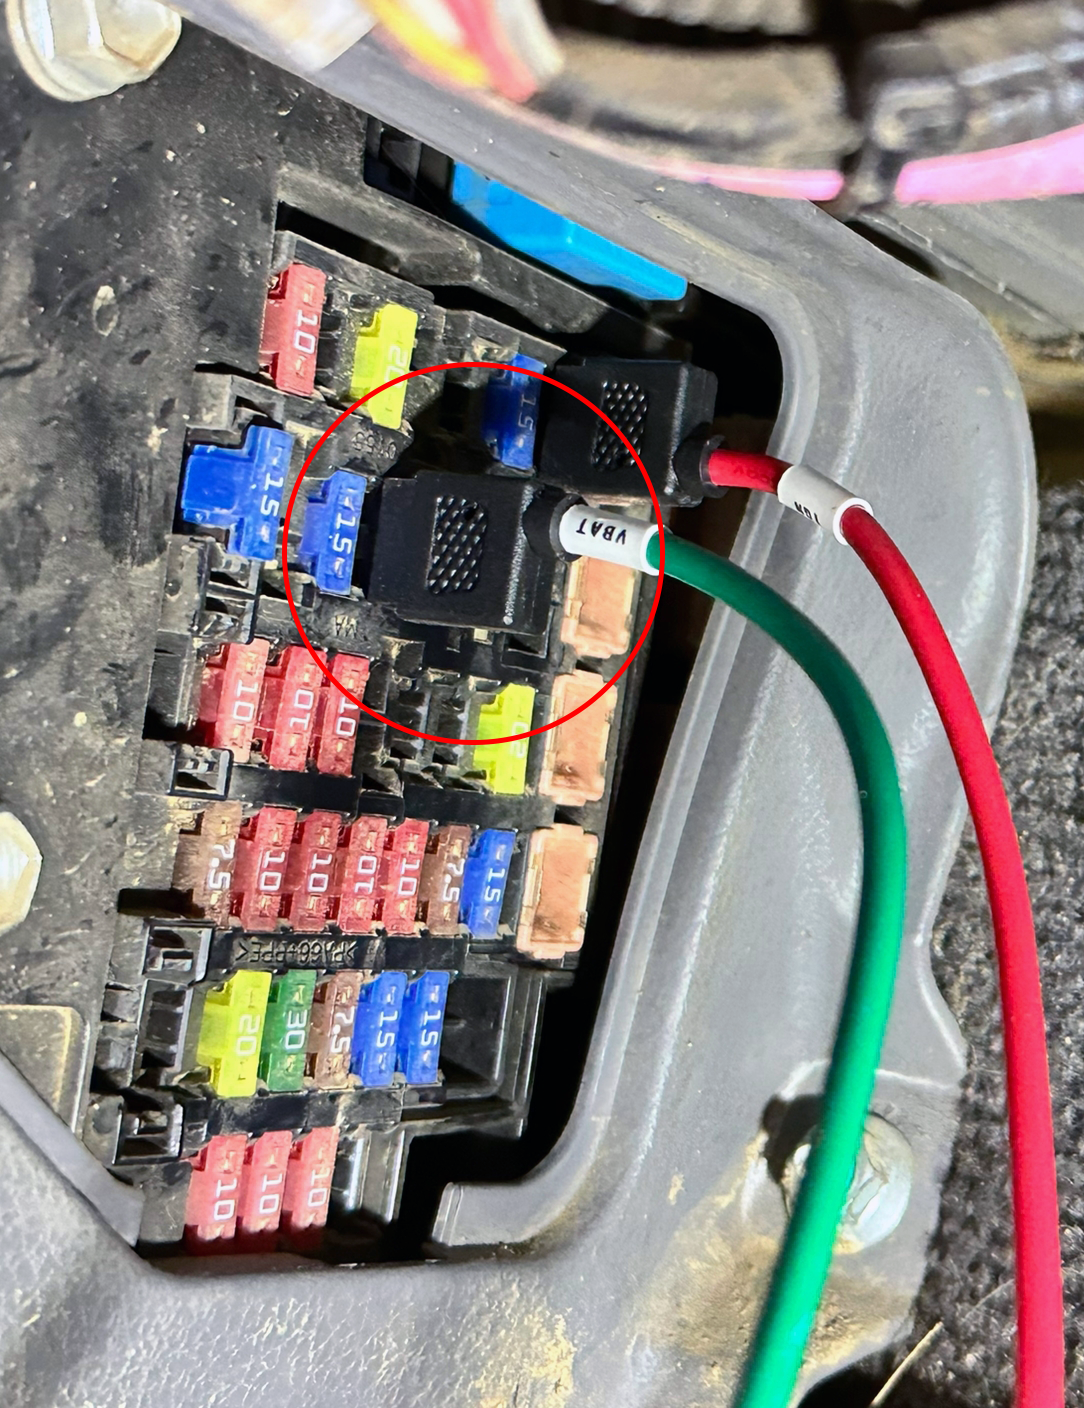
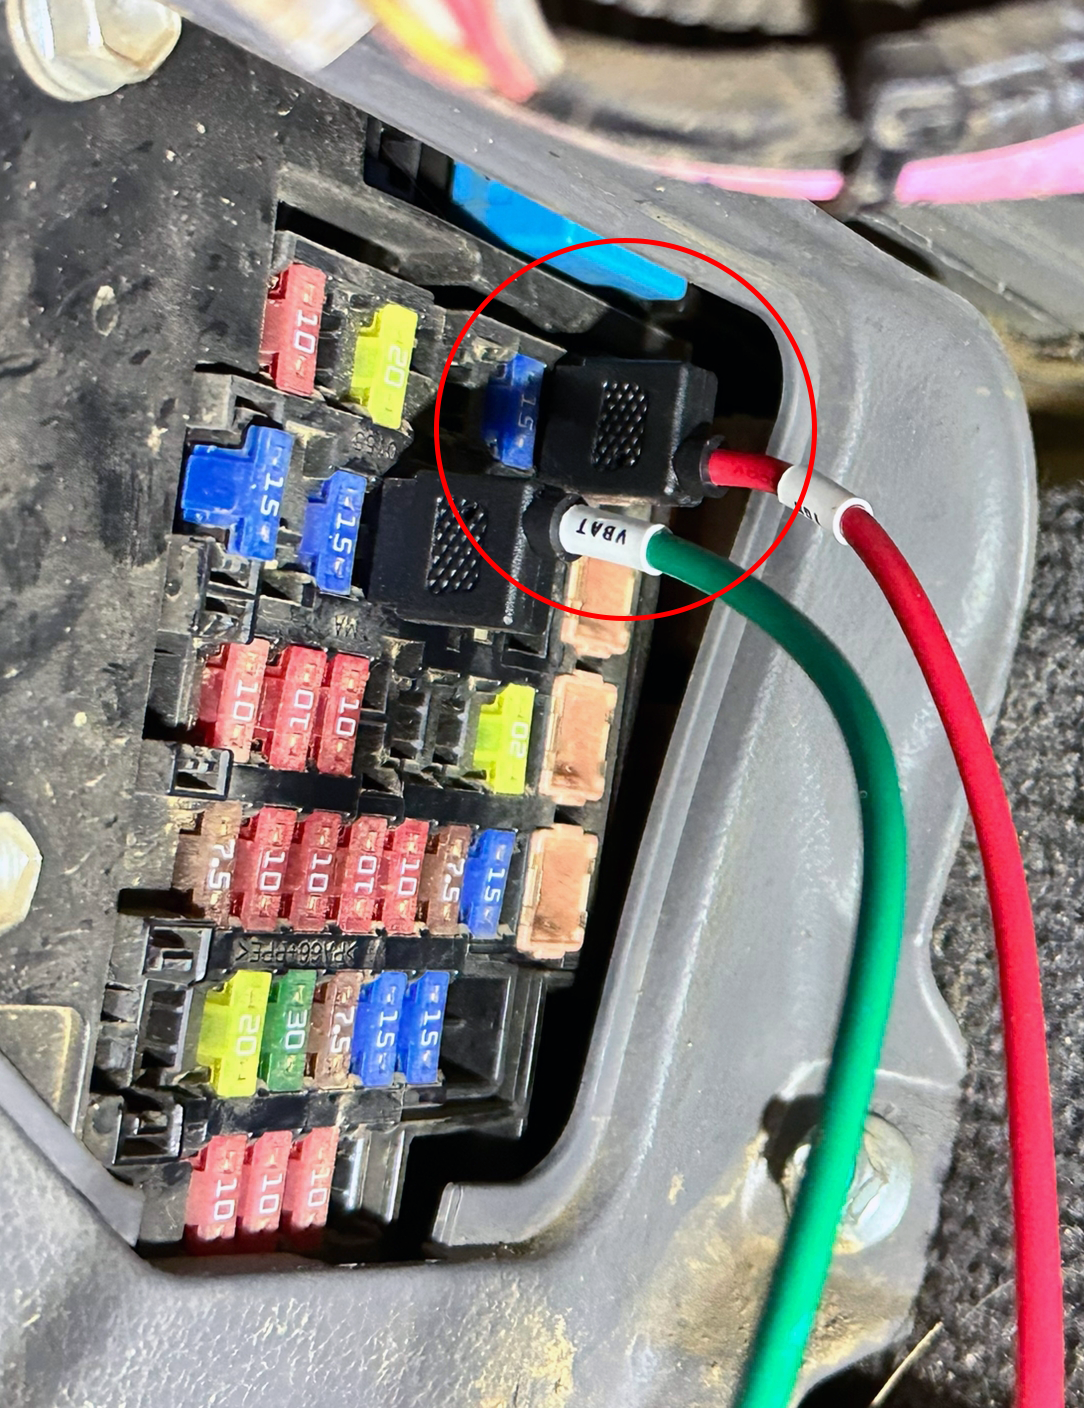
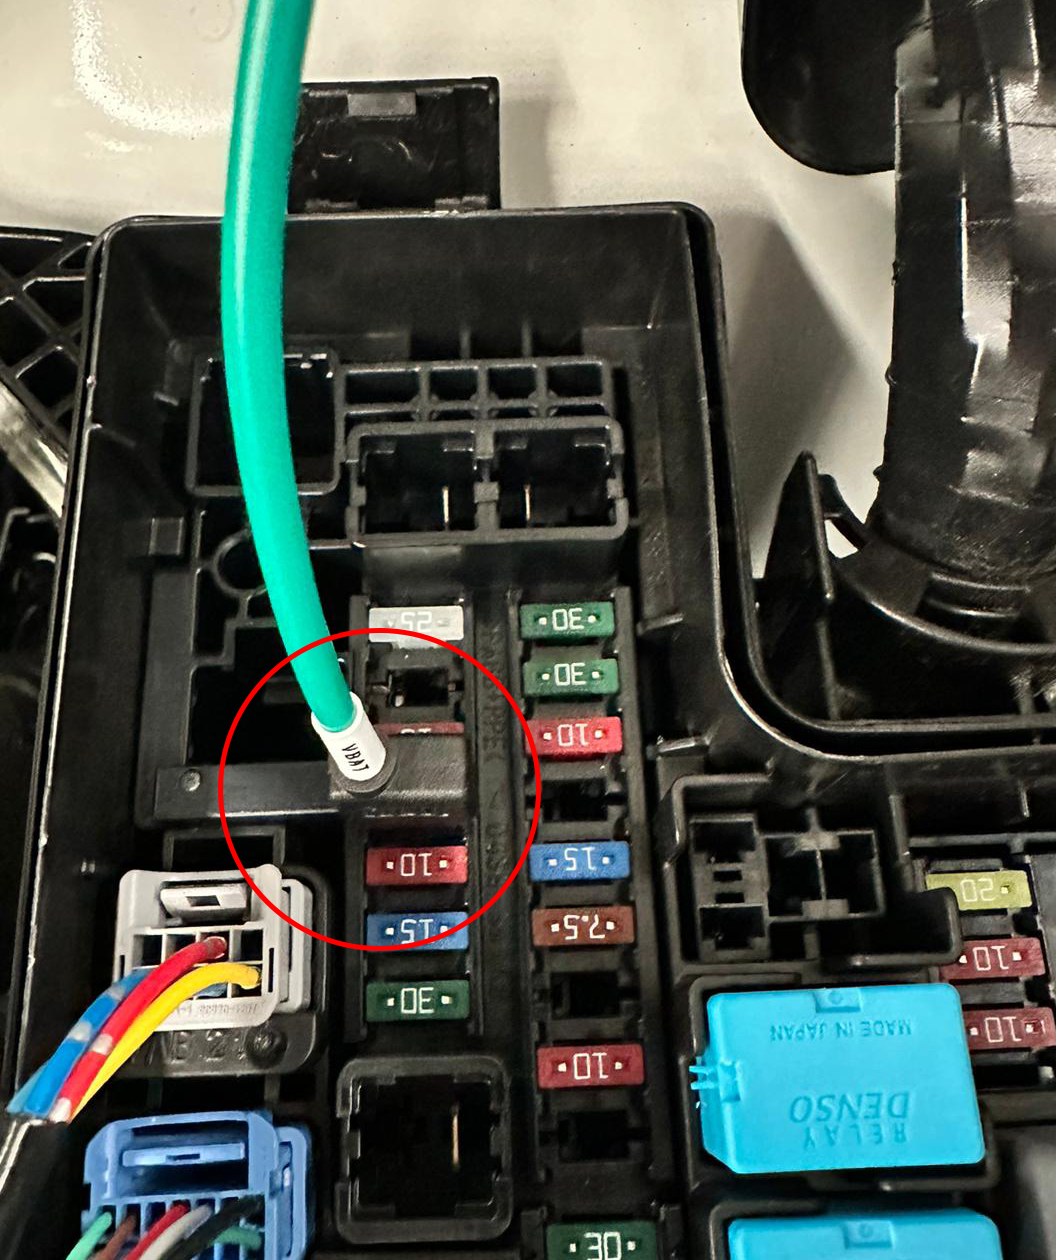
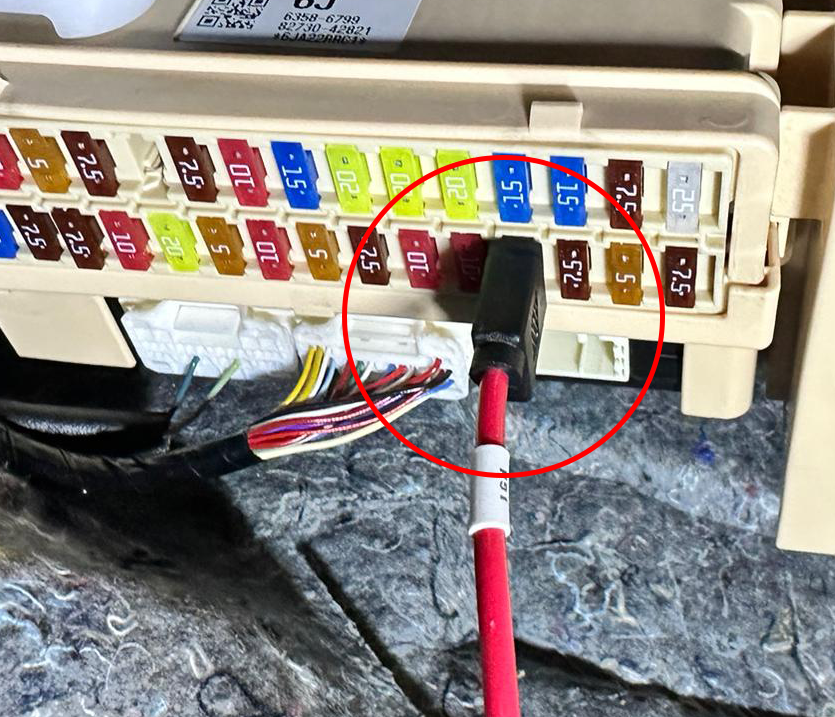
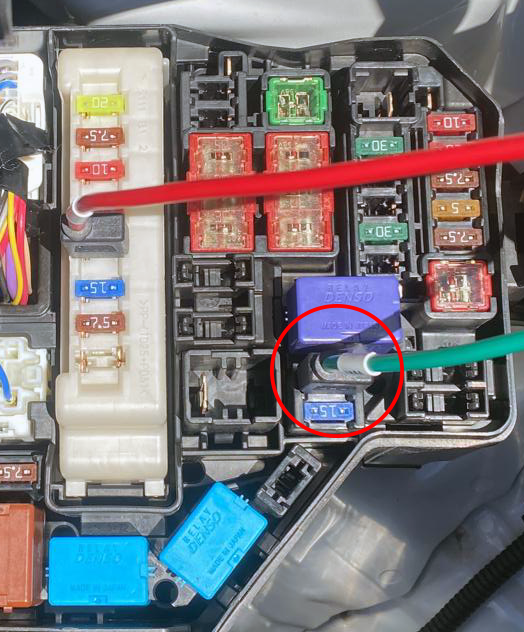
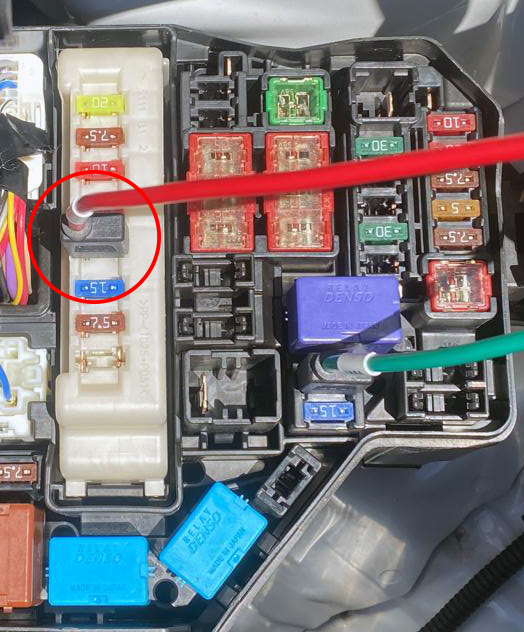
These two cables have a fuse connector on the end. The goal is to connect directly to the immobiliser box power lines via the associated electrical circuits in the fuse boxes. These circuits will not only power the immobiliser box, but also other components depending on the model of vehicle. This is why in some cases during the procedure other devices such as the instrument cluster may turn on and off etc.
Theses cables need to be inserted into the relevant fuse position the correct way around for the procedure to work. The "LED box" part of the harness has green and red lights to indicate the correct position. This explained in detail during the programming procedure.
- GREEN CABLE (+12v) is for the main battery feed (hot at all times) on the immobiliser
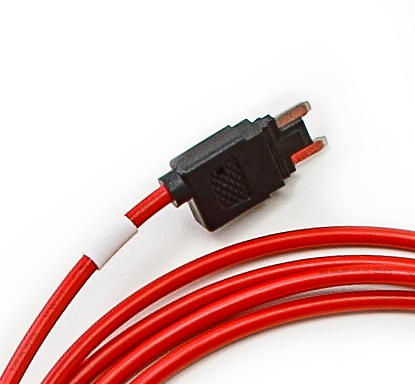
- RED CABLE (IGN) is for the ignition switch power line on the immobiliser
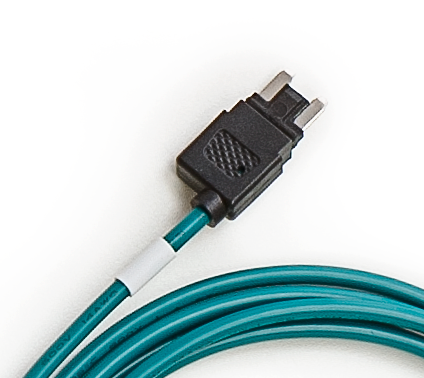
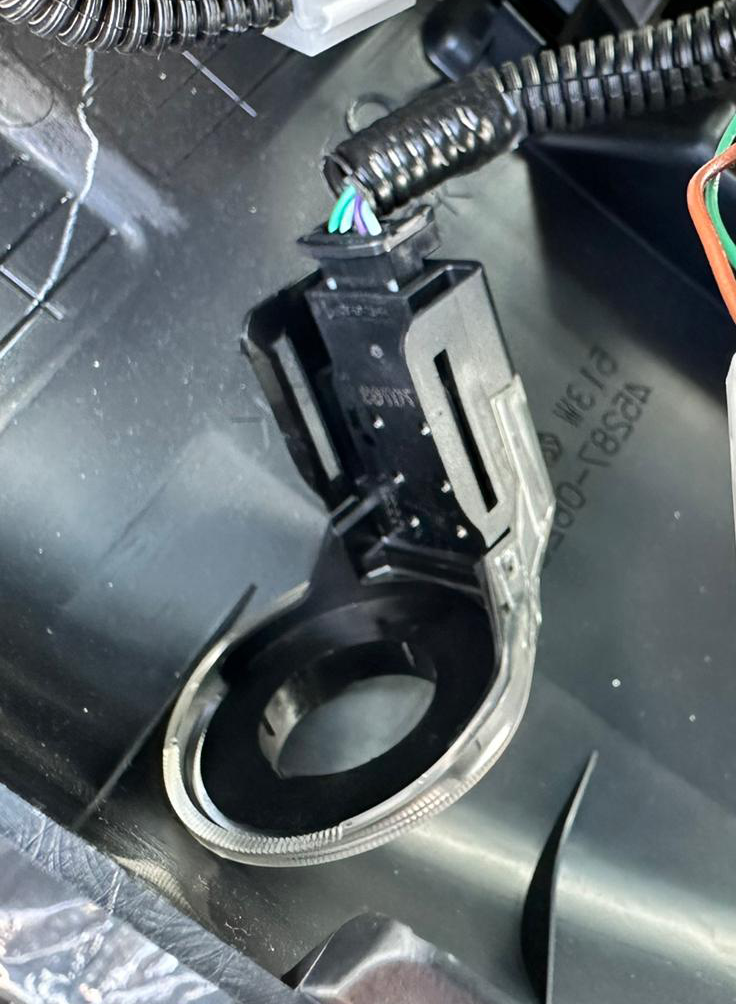
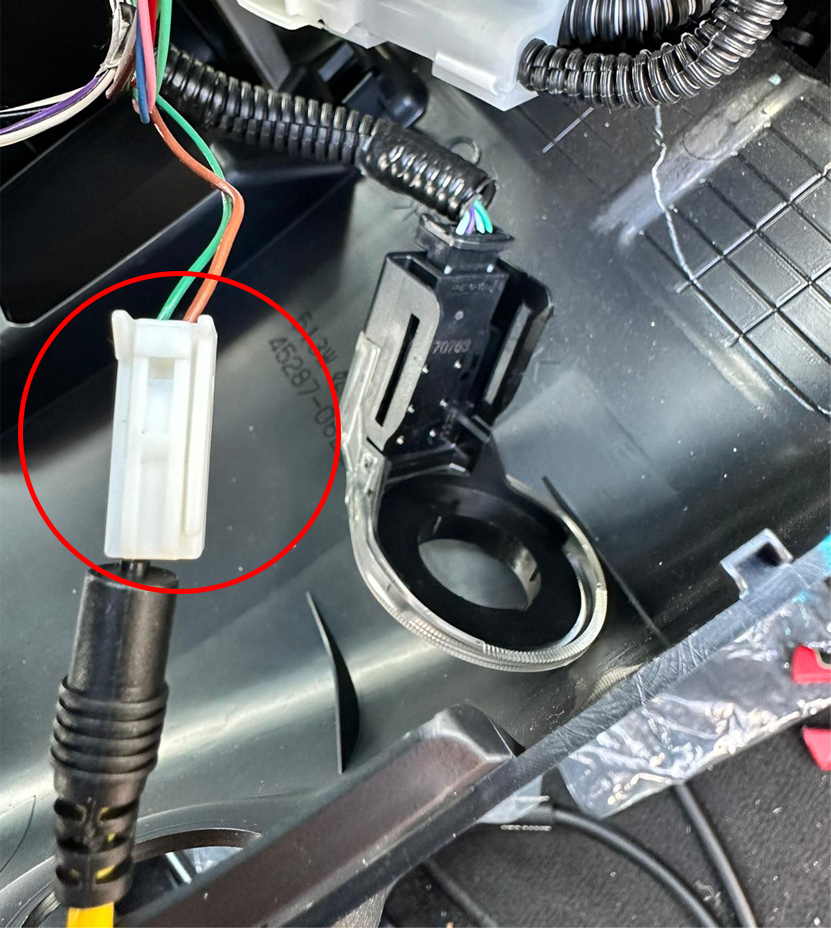
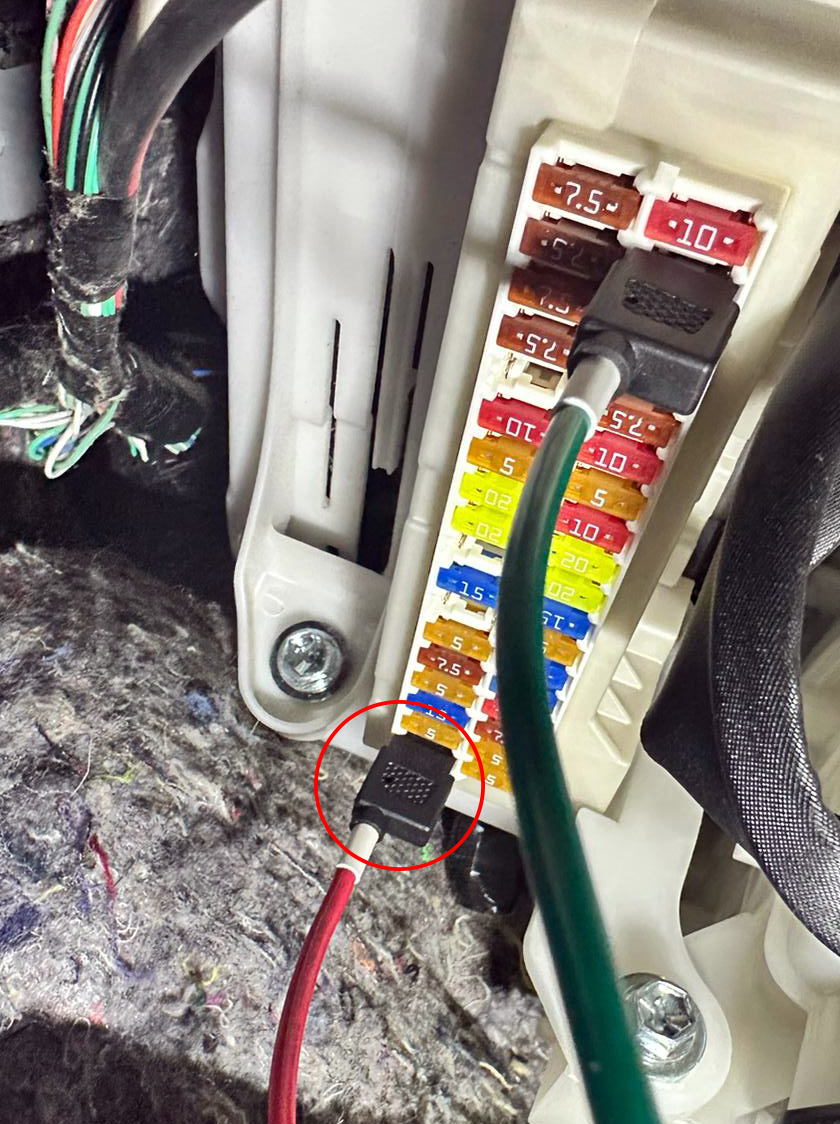
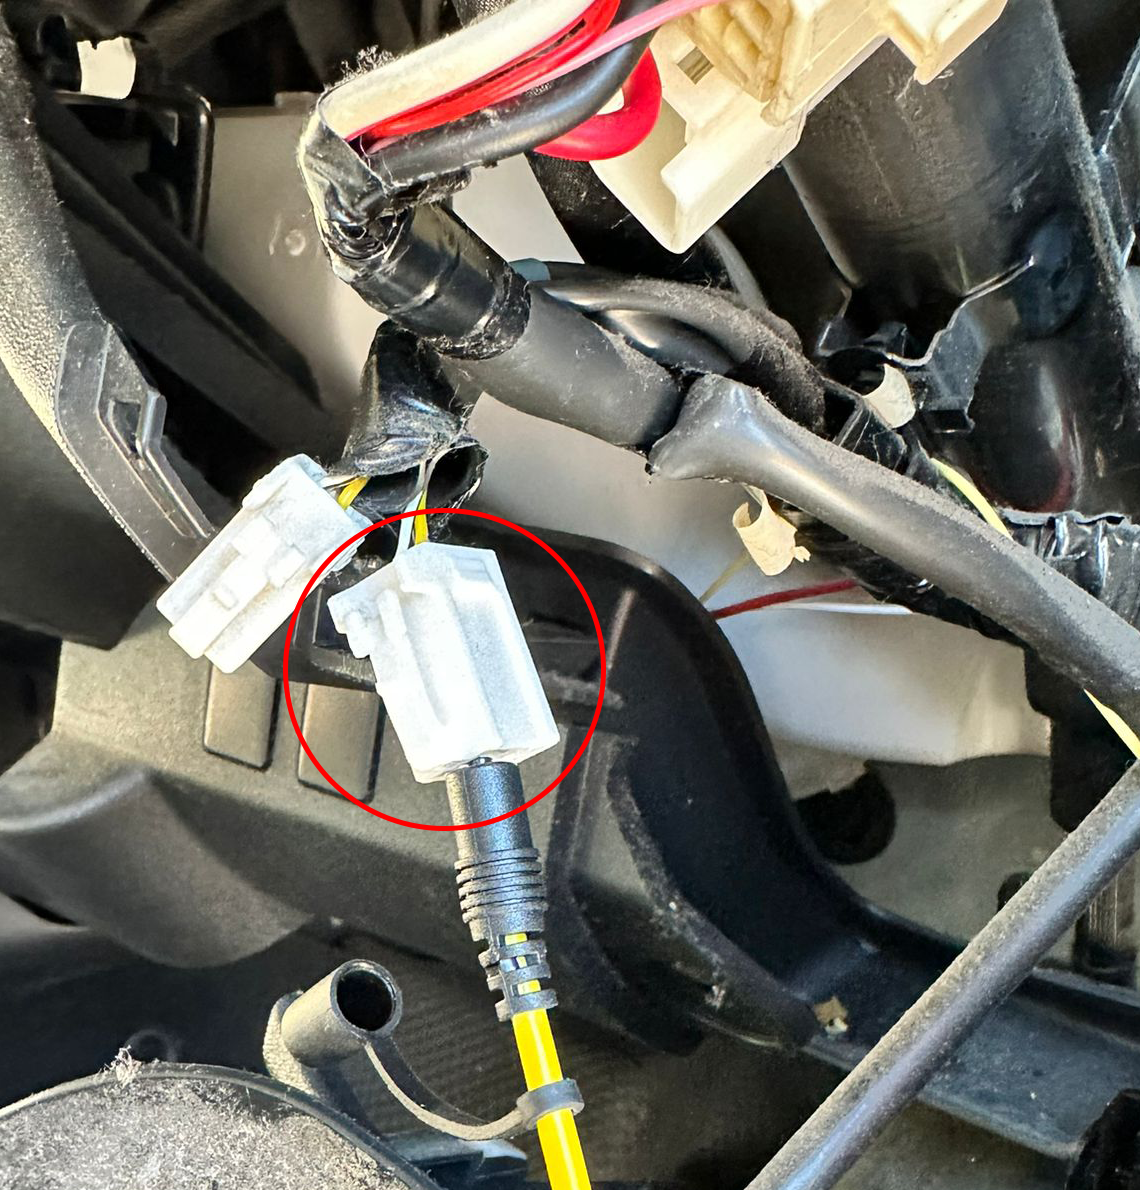
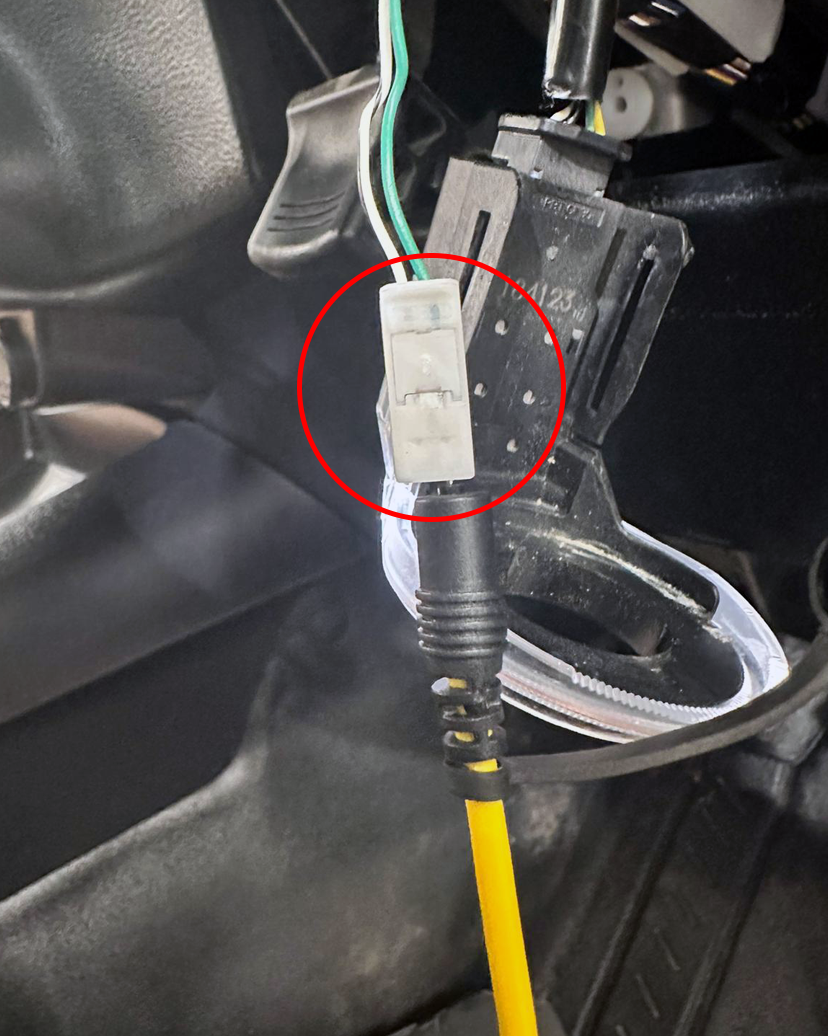
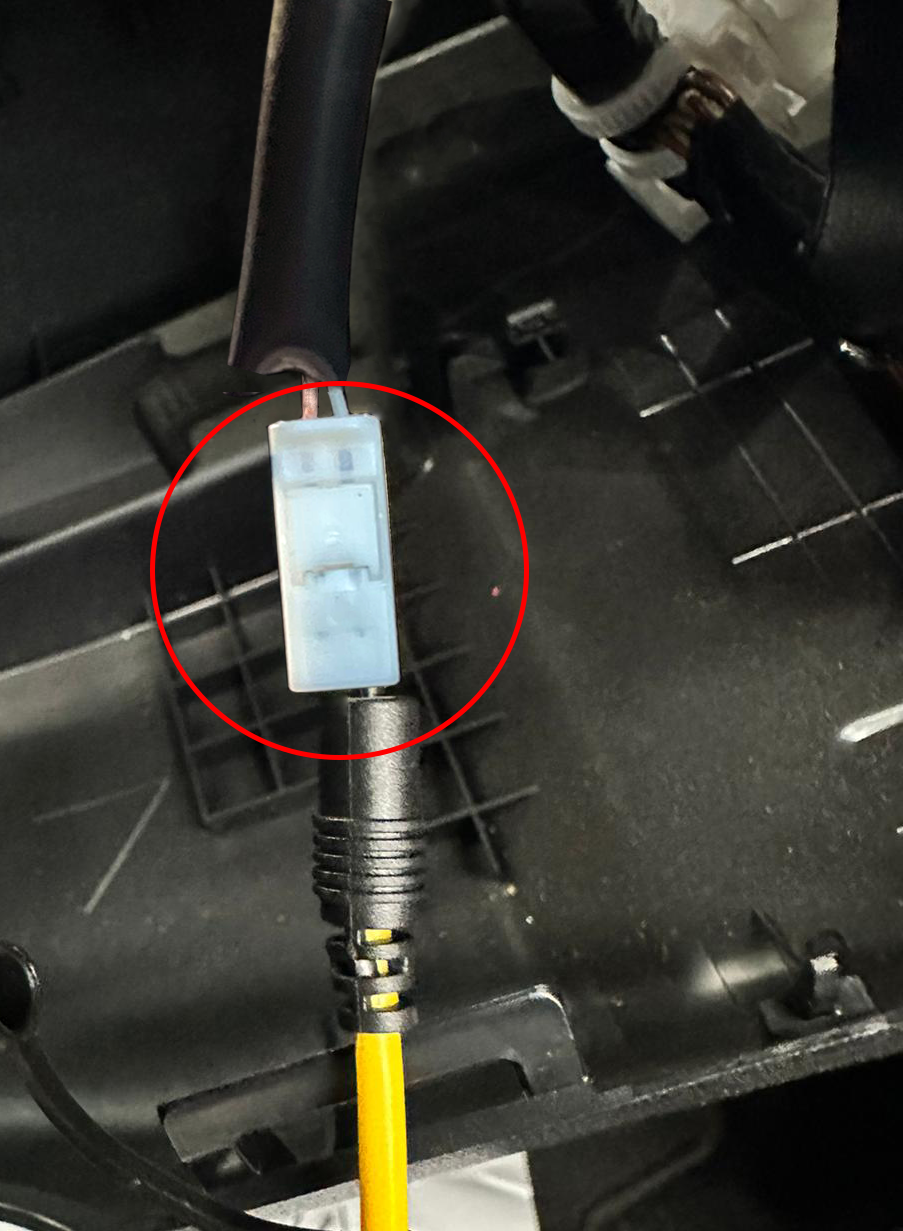
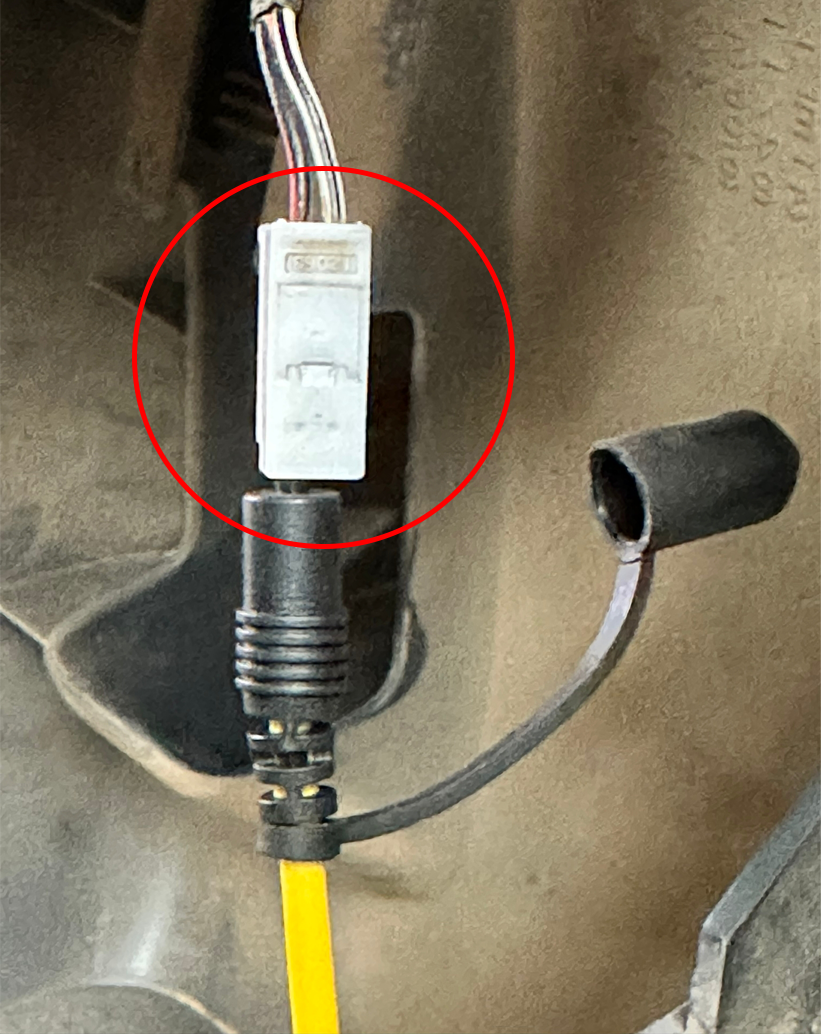
YELLOW CABLE
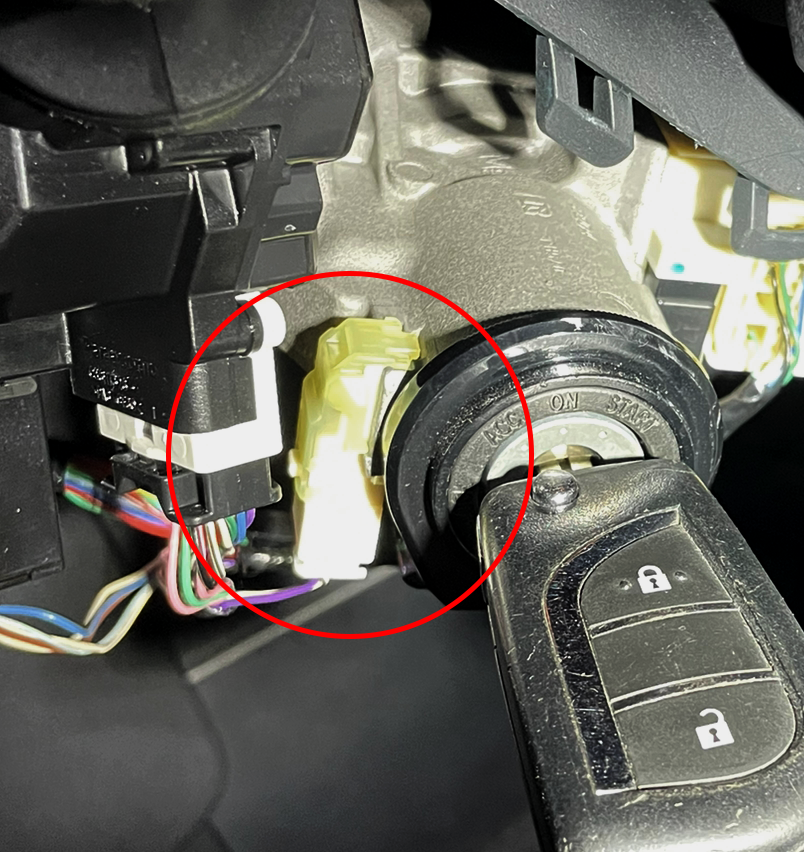
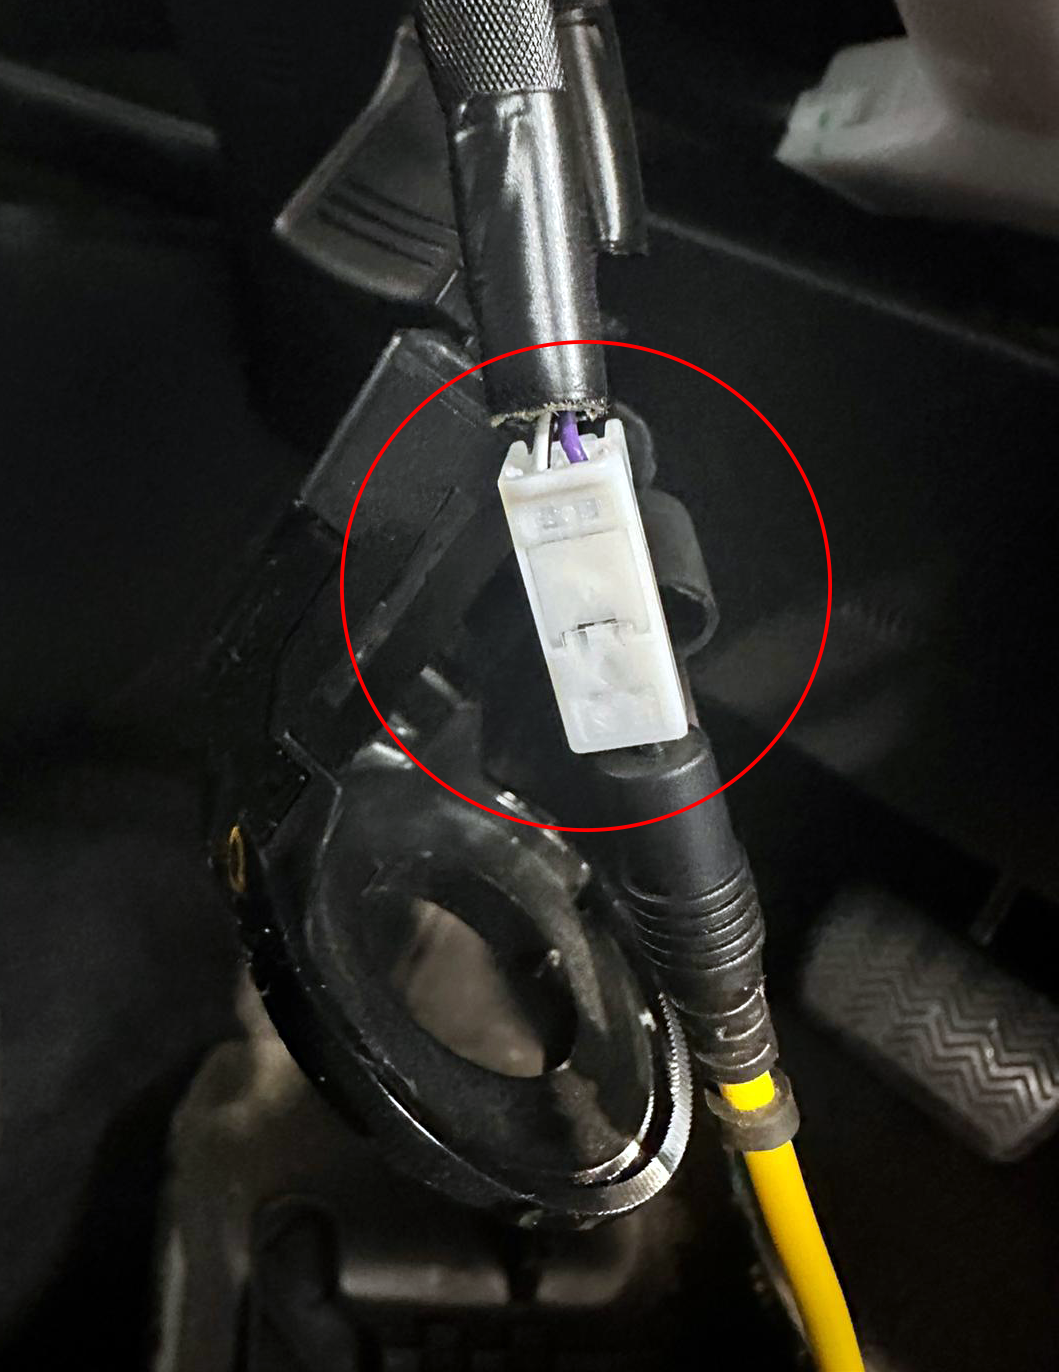
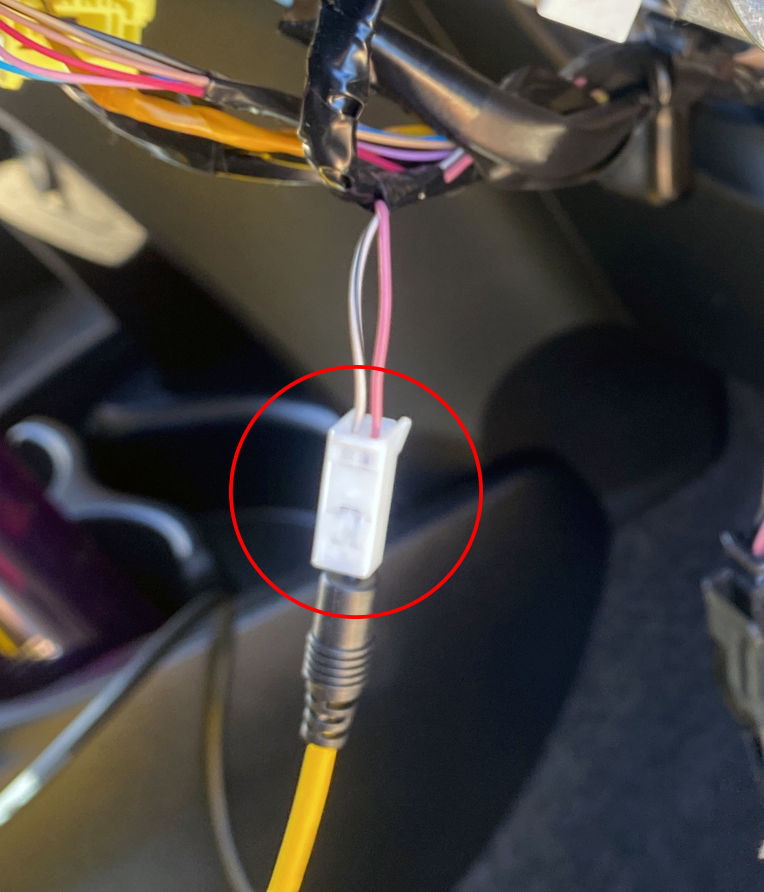
This cable has a single probe on the end, it connects to the key warning switch on the side of the ignition. This will require removing the covers around the ignition to expose the plug connector. There are normally two wires in this plug, one leads into the immobiliser and the other goes to ground. Not all models have the same key switch connector shape, this is why the cable ends in a single pin/probe rather than a full plug. This probe is simply inserted into the appropriate pin on the disconnected plug.
Note; examples of the colour of cable to connect to have been specified per each model, such as VIOLET, GREEN, YELLOW etc. These colours have been found in real world examples, but the nature of Toyota wiring can be various so may not always be 100% accurate. Regardless there is no harm in connecting to the incorrect one, just try the alternative if needed.
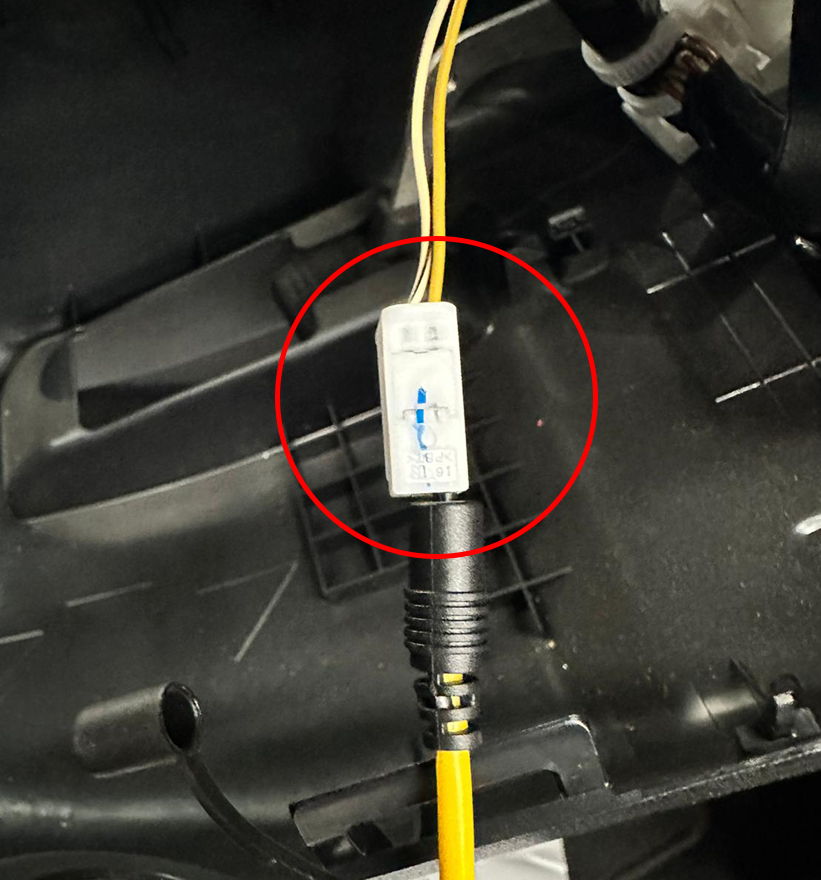
- YELLOW CABLE (K-Switch/KSW) is for connecting to the "Key Unlock Warning switch" line on the immobiliser.
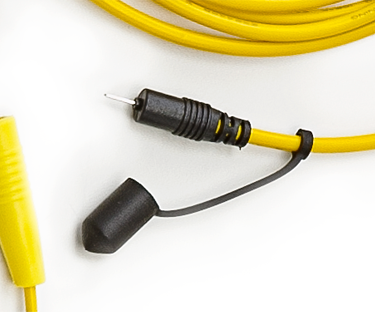
- Example of KSW / K-Switch on side of Corolla ignition
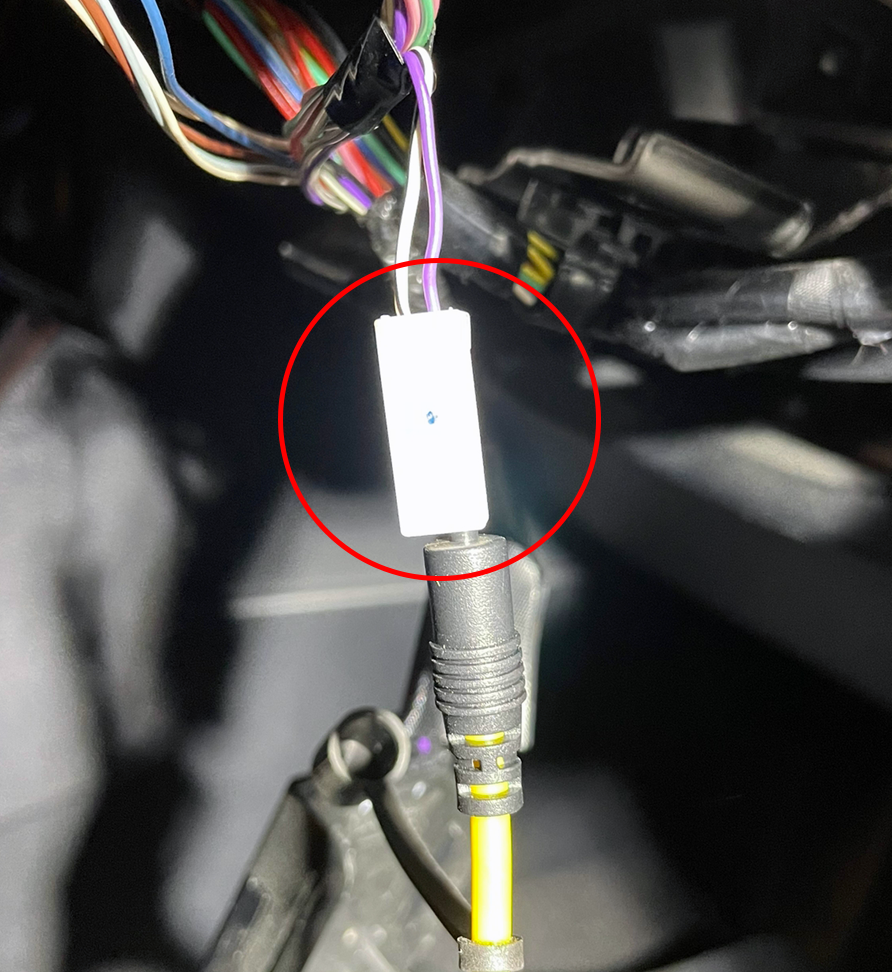
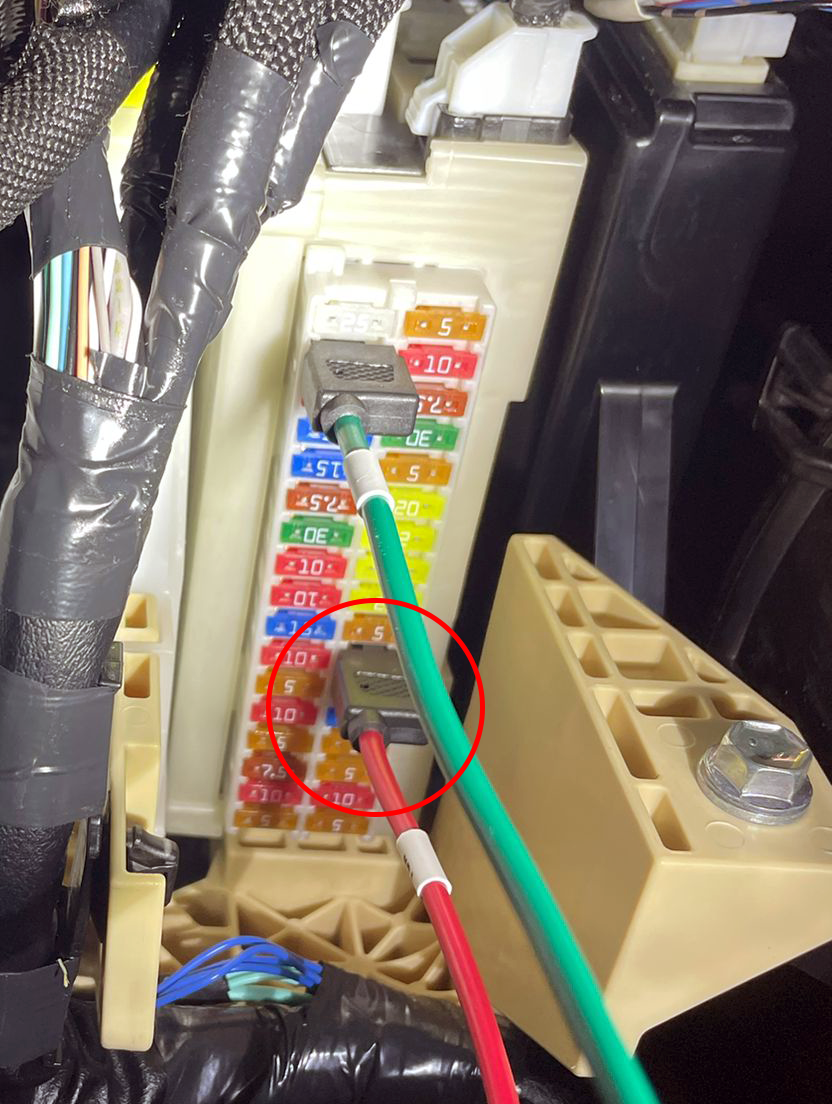
OBD CABLE
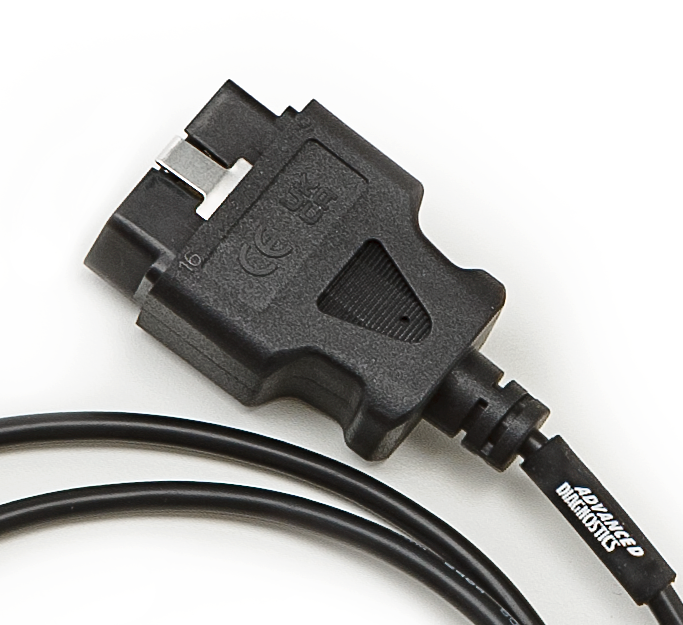
- OBD CABLE provides battery power, ground and communication connections.
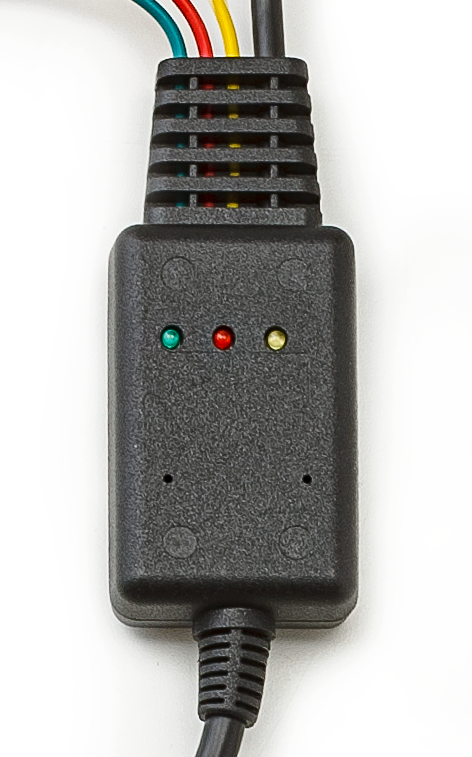
- LED BOX contains three LED lights which show the status of power flow though the cables.
During the procedure the software will instruct the user to monitor the status of the LED lights on this box. The fuse cables need to be inserted into the fuse box positions the correct way around for it to work, these LED's will assist in making sure this is correctly done.
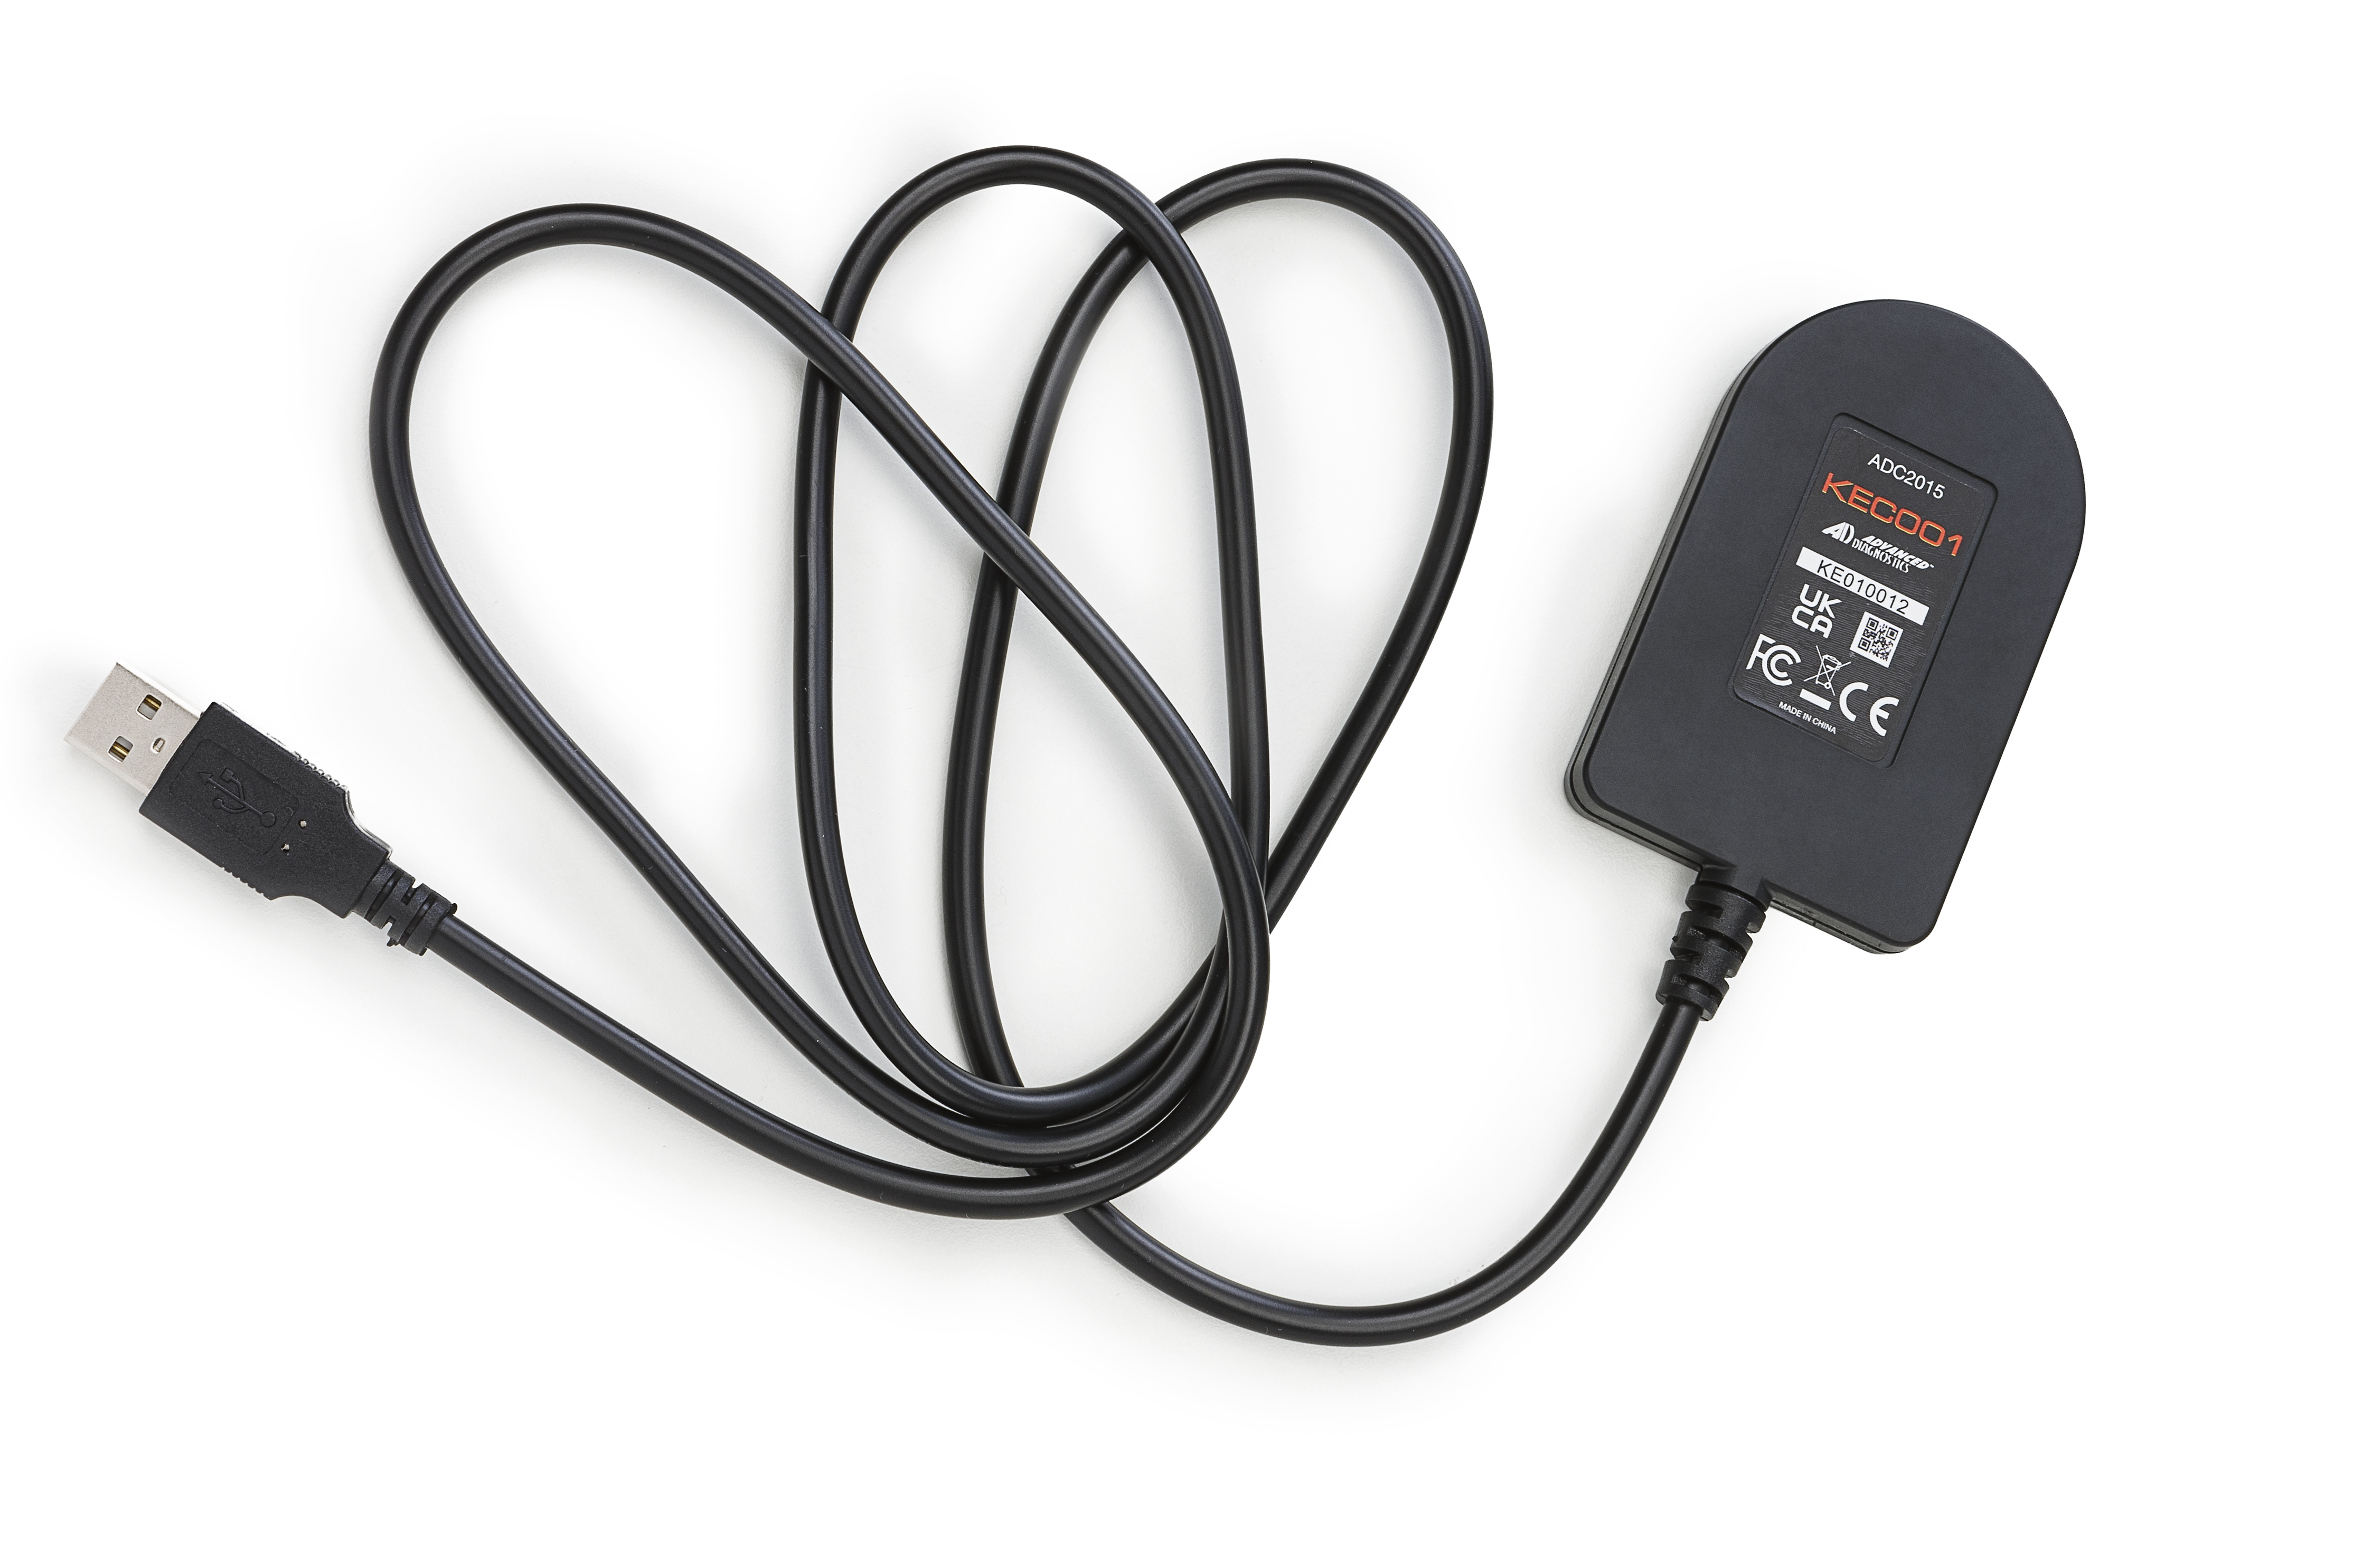
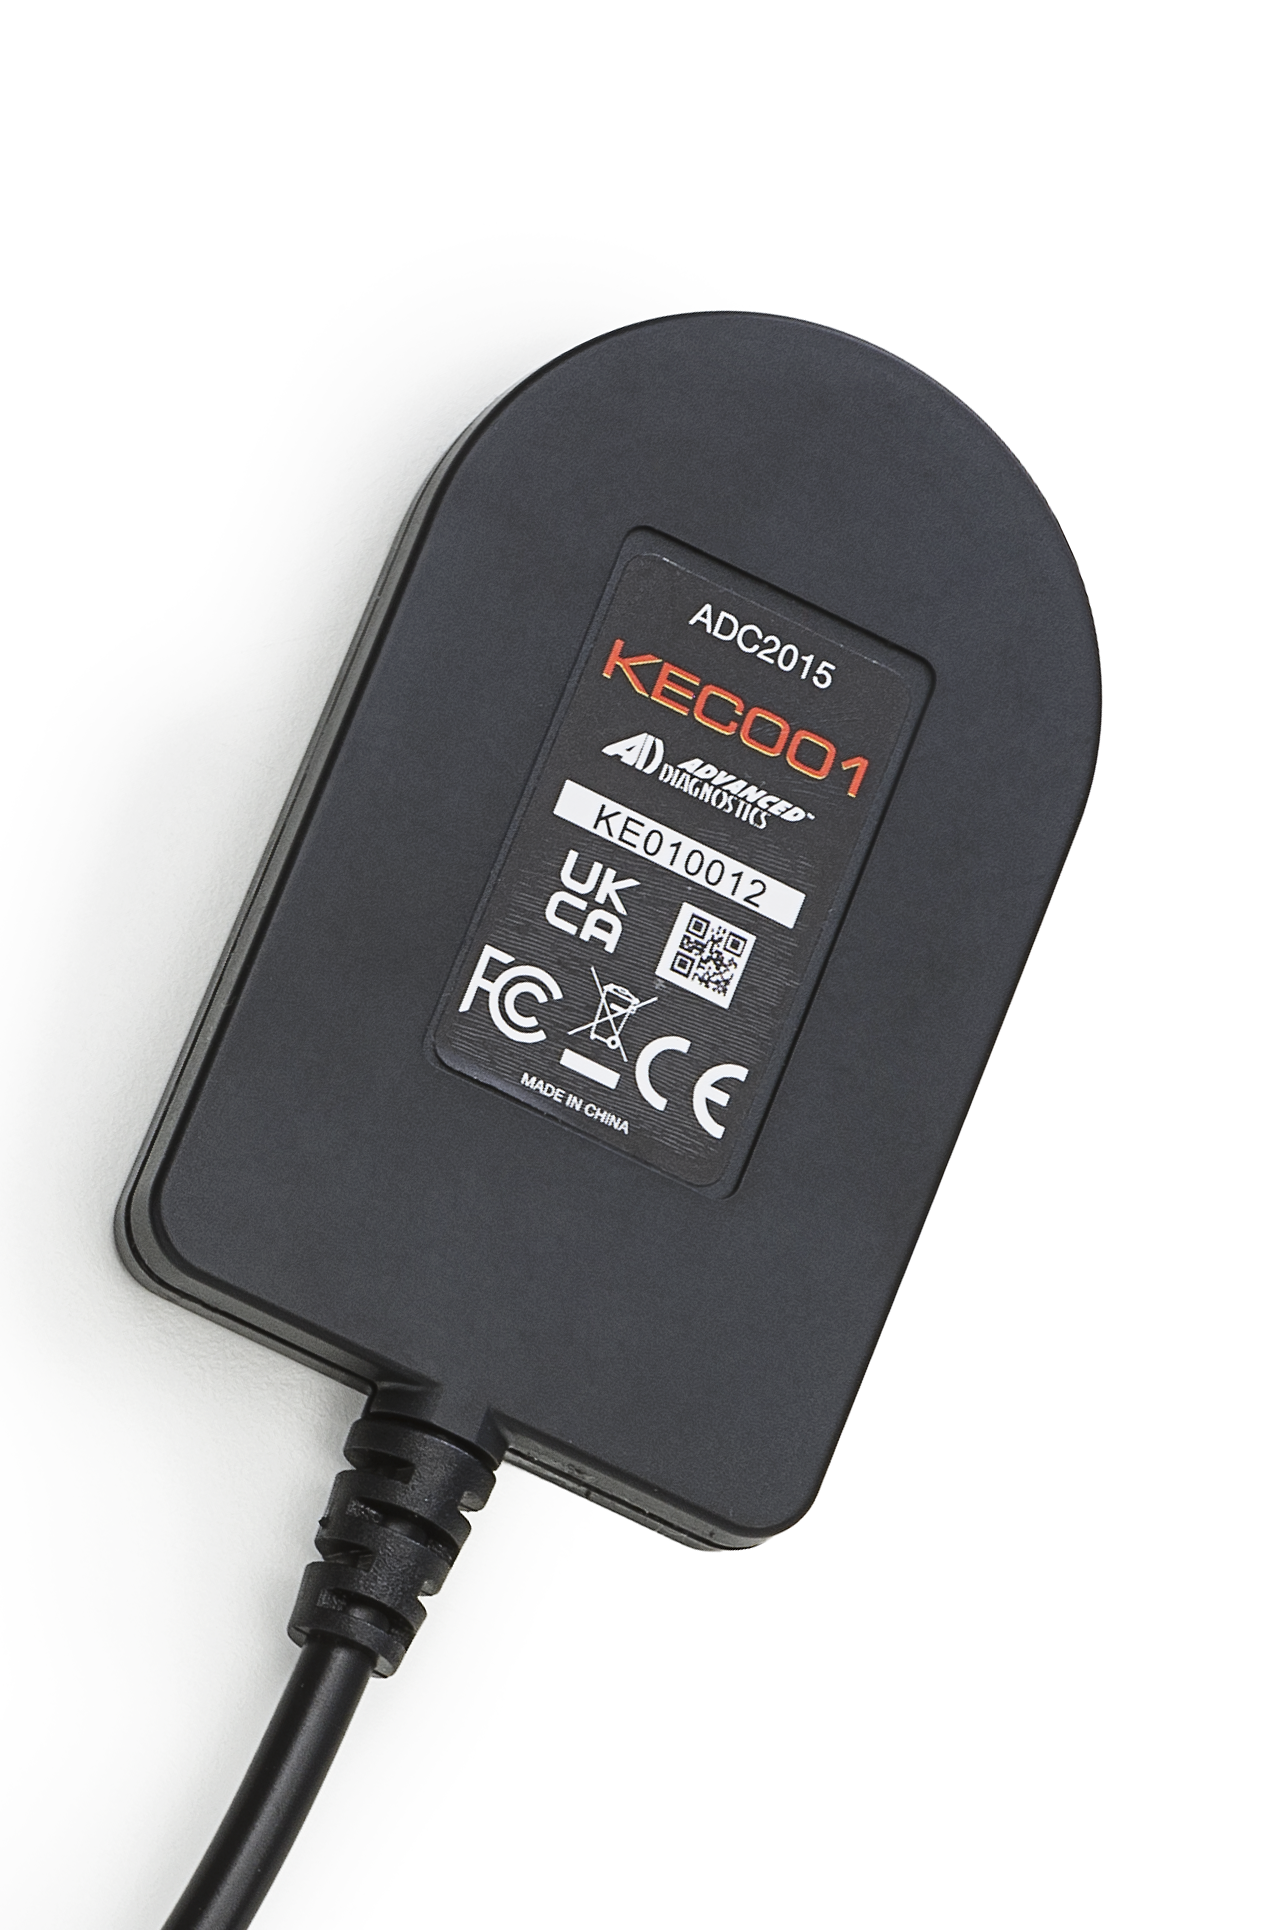
ADC2015 KEY EMULATOR
The ADC2015 is designed to allow transponder emulations for Texas Instruments DST transponders, predominantly for use with Toyota Proximity systems where all keys are lost. It can however also be used as a convenient way to emulate a working master key on DST128 "H" key bladed systems once the data has successfully been extracted with the Smart Pro and ADC2016 H key harness. Simply put, the emulator will become a temporary working master key to allow programming of additional real H key transponders or OEM keys as would normally be performed for a spare key job
NOTE WHEN ADDING NEW KEYS / TRANSPONDERS
 When it comes time to use the ADC2015 Emulator as the working master key to add new keys or transponders, it is important to remember that only one "key" can be switched on in the ignition at a time.During the process the user will be asked to switch on the ignition with the emulator held up. When doing this, make sure that the mechanical key does not also have a transponder inside at the same time as it will cause a conflict. There are two simple ways to avoid this:
- If only programing transponders, use a "brass" key or a empty plastic headed key to turn ignition on at the point of presenting the ADC2015 emulator.
- If programming OEM remote keys, or keys with a non removable transponder, the simplest way its to dismount the transponder reader coil from the ignition, as it will already be exposed due to the need to access the KSW plug. This easily slides off the front of the ignition forwards, no screws or clips need to be removed.
- Dismounted reader coil
- Present ADC2015 to reader coil when prompted.
- Mount the reader back to ignition before presenting new keys to be programmed
Harness Locations
Below are the specific locations to install each of the ADC2016 coloured cables.
Note: regarding the Yellow K-Switch/KSW Cable;
Examples of the colour of cable to connect to have been specified per each model, such as VIOLET, GREEN, YELLOW etc. These colours have been found in real world examples, but the nature of Toyota wiring can be various so may not always be 100% accurate. Regardless there is no harm in connecting to the incorrect one, just try the alternative if needed. As a Tip, it will not be a White wire with a Black stripe.
Note: Some models list a note *Dependent on Immobiliser part number".
It has been found that in some cases after 2018, the immobiliser hardware changes to a later design which cannot support the “harness all keys lost method”. In some cases it appears the old and new hardware run in parallel depending on trim level or other factors. Unfortunately there is no easy way to determine which part is fitted, just connect and attempt the procedure there is no risk, it will just fail at the end.
Camry (2014 - 2017) / (2018 - >*)
*Dependent on Immobiliser part number
|
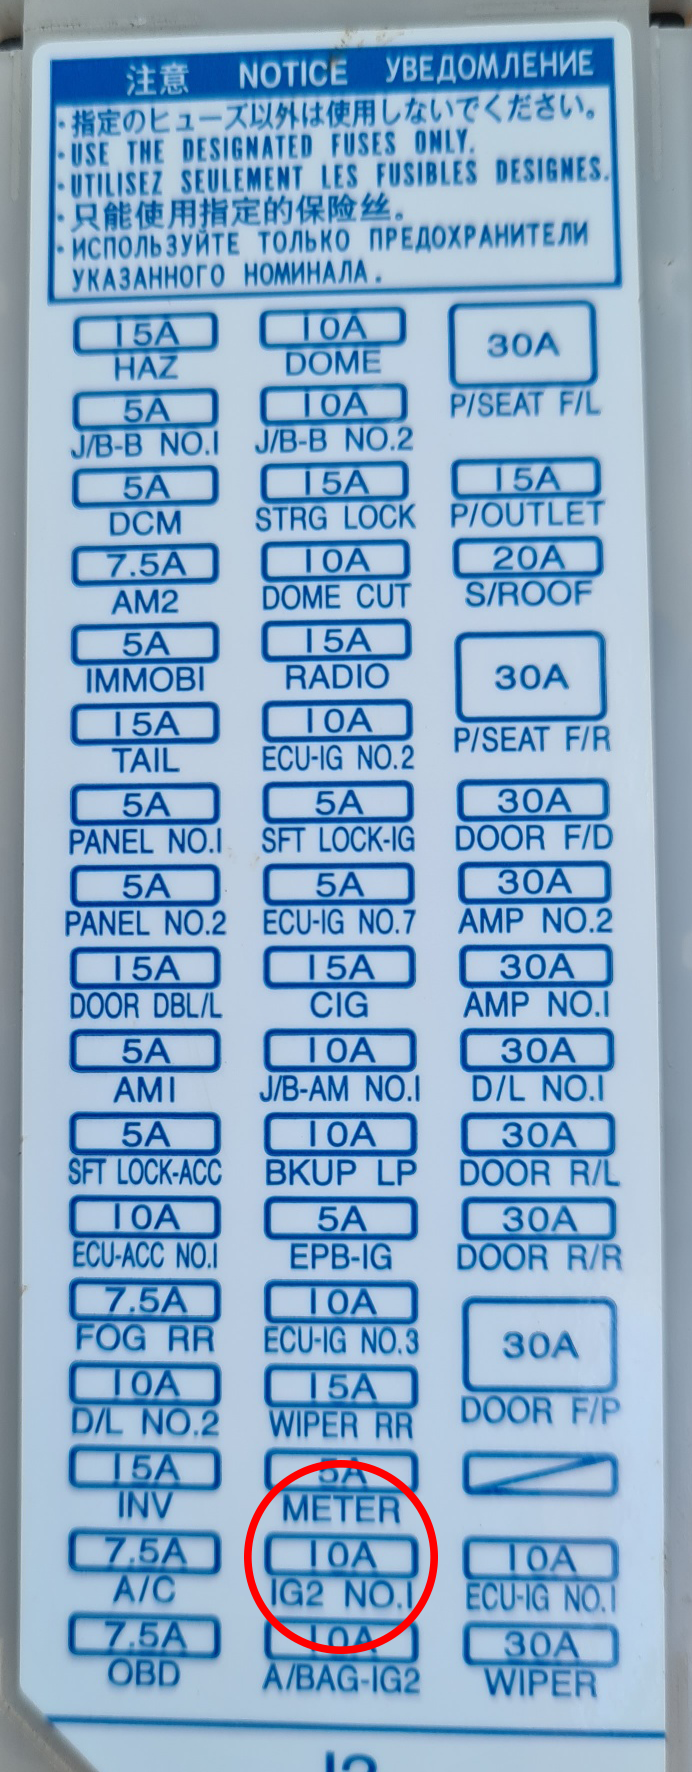
+12V Cable Location:
- ECUB No. 1 (10amp)
- Engine bay fuse/relay box
Ignition Cable Location:
- ECU-IG2 No. 2 (7.5amp)
- Located in the cabin fuse box
K-Switch Location:
- GREEN wire on two pin KSW connector
- Ignition cylinder
+12V Cable Location:
- ECUB No. 2 (10amp)
- Engine bay fuse/relay box
Ignition Cable Location:
- IGN (7.5amp)
- Located in the cabin fuse box
K-Switch Location:
- VIOLET wire on two pin KSW connector
- Ignition cylinder
CH-R (2016 - >*)
*Dependent on Immobiliser part number
|
+12V Cable Location:
- ECUB No. 1 (5amp)
- Cabin Fuse box
Ignition Cable Location:
- ECU-IG2 No.3 (5amp)
- Cabin Fuse box
K-Switch Location:
- VIOLET wire on two pin KSW connector
- Ignition cylinder
LAND CRUISER 200 SeRIES (2015 - 2021)
|
+12V Cable Location:
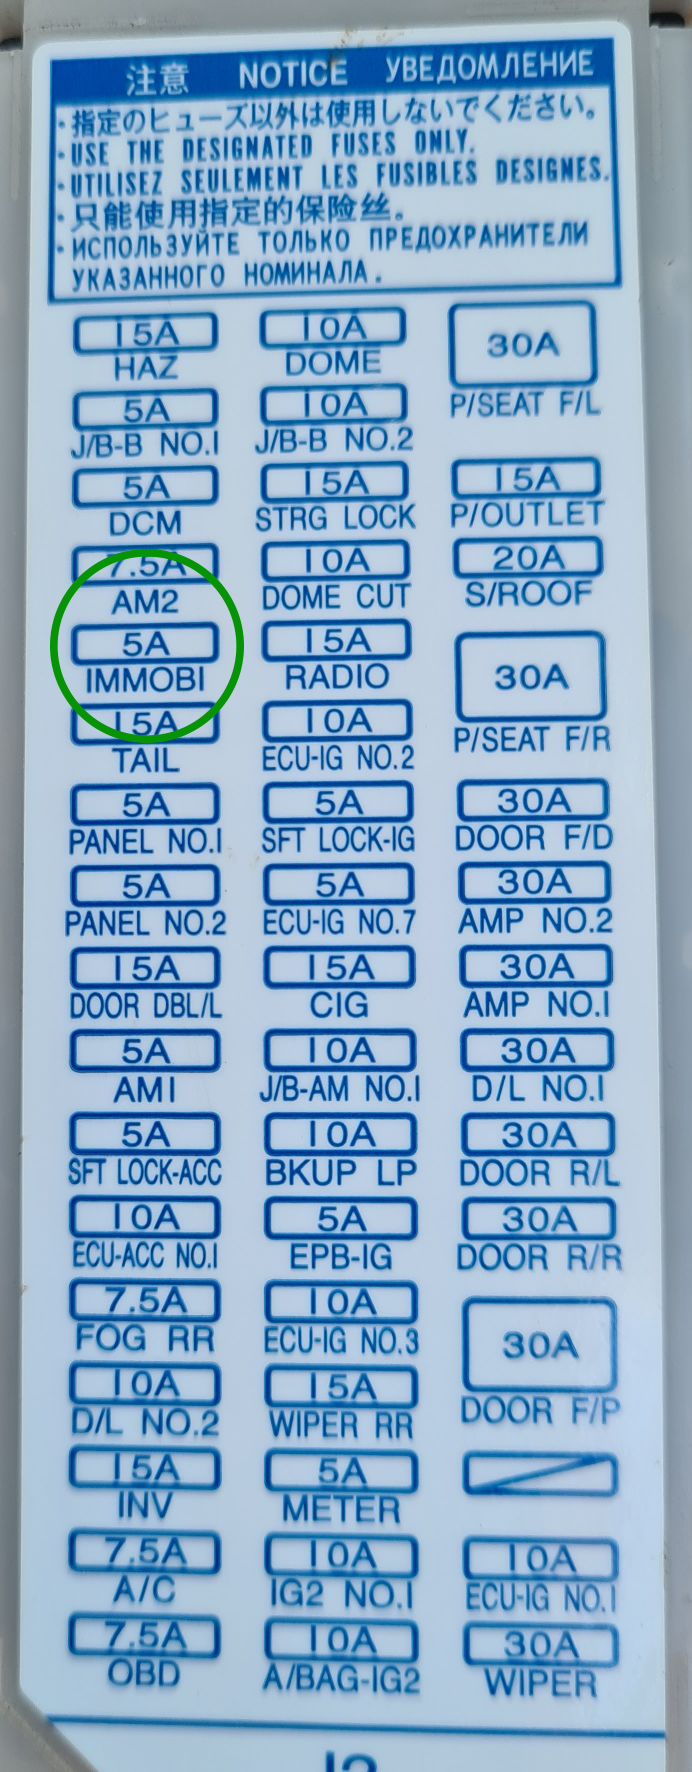
- IMMOBI 1 (5amp)
- Cabin Fuse box
Ignition Cable Location:
- IG2 No.1 (5amp)
- Cabin Fuse box
K-Switch Location:
- GREEN wire on two pin KSW connector
- Ignition cylinder
+12V Cable Location:
- ECU- B (10amp)
- Engine bay (under driver seat) fuse/relay box
Ignition Cable Location:
- IG2 No.2 (10amp)
- Cabin (under glove box) fuse/relay box
K-Switch Location:
- YELLOW wire on 4 pin KSW connector
- Ignition cylinder rear
Hilux / FORTUNA (2015 - 2020)
|
+12V Cable Location:
- ECU-B No.2 (10amp)
- Engine bay fuse/relay box
Ignition Cable Location:
- IGN 2 No.3 (5amp)
- Cabin fuse box under glove box
K-Switch Location:
- GREEN wire on two pin KSW connector
- Ignition cylinder
+12V Cable Location:
- MPX-B No.3 (5amp)
- Cabin fuse box
Ignition Cable Location:
- IGN2 (7.5amp)
- Cabin fuse box
K-Switch Location:
- WHITE wire on two pin KSW connector
- Ignition cylinder
Land Cruiser VDJ79 (2016 +)
|
+12V Cable Location:
- ECUB (10amp)
- Cabin Fuse box passengers side kick panel
Ignition Cable Location:
- ECU IG (15amp)
- Cabin Fuse box passengers side kick panel
K-Switch Location:
- BLACK / RED wire on two pin KSW connector
- Ignition cylinder
+12V Cable Location:
- ECUB No. 2 (10amp)
- Engine bay fuse/relay box
Ignition Cable Location:
- IGN (7.5amp)
- Located in the cabin fuse box
K-Switch Location:
- YELLOW or GREY wire on two pin KSW connector
- Ignition cylinder
+12V Cable Location:
- ECU-B No.1 (5amp)
- Engine Bay
Ignition Cable Location:
K-Switch Location:
- PINK wire on two pin KSW connector
- Ignition cylinder